
Getting Started with DataWedge on Zebra Devices
The sample repository to accomplish this tutorial can be found at https://github.com/darryncampbell/DataWedge-GettingStarted-Samples
The following guide will show you how to get started developing an application to capture barcode data on Zebra mobile computers using Zebra's DataWedge tool. There is extensive documentation on DataWedge available on the Techdocs page, most of which will not be covered by this guide, including the profile mechanism and available plugins.
DataWedge is a service that exists on all Zebra mobile computers that controls the scanner (or other data capture hardware such as RFID) enabling your application to interact with the hardware in a very straightforward manner.
This guide will show how to interact with DataWedge using Intents. The same sample app is given in Java, Kotlin and Xamarin but since the DataWedge service remains unchanged in each case, the code to do so is very similar.
Running applications
DataWedge Configuration
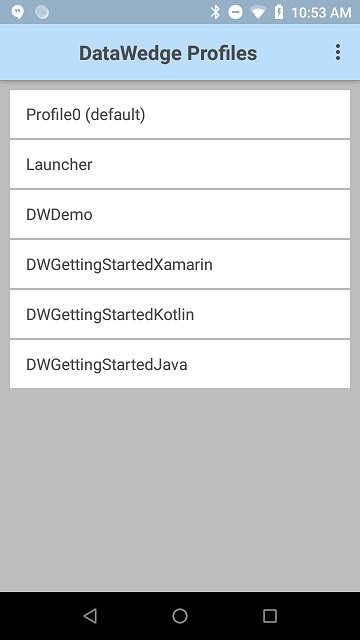
All Zebra Mobile computers will have a pre-installed application, DataWedge, which allows you to configure the DataWedge service. Configuration is done using 'Profiles'. If you run any of the sample applications in this repository you should see that the appropriate profile has been created for you. If you do not see the profiles then your device is probably running a version of DataWedge prior to 6.4, that is not a problem but does mean you need to create the profiles manually - see the section at the end
The profiles are being created using the DataWedge SET_CONFIG API which will not be covered in this guide but has been done to make it easier to get up and running with these samples. Other techniques exist to mass deploy DataWedge configurations.
Listening for Scan Data
DataWedge is very flexible how scan data is returned to your application; you can choose to receive key strokes, an Intent or even send the output to an external IP address. Output is controlled by the DataWedge output plugin and these samples will make use of the Intent output mechanism.
For simplicity these samples use the "Send as startActivity" Intent output type but you can also receive the Intent through a service ("Send as startService") or as a broadcast ("Broadcast intent"), it all depends how you have configured your DataWedge profile.
In the sample app manifests the launchMode is specified as "singleTop" meaning the existing activity will be re-used whenever launched by a new Intent (more information from the standard Android docs) and the Intent is received in the onNewIntent() call
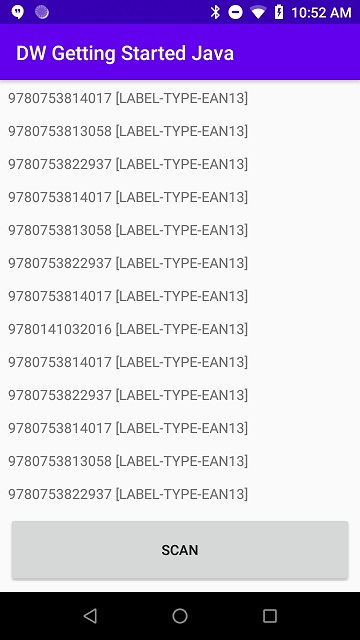
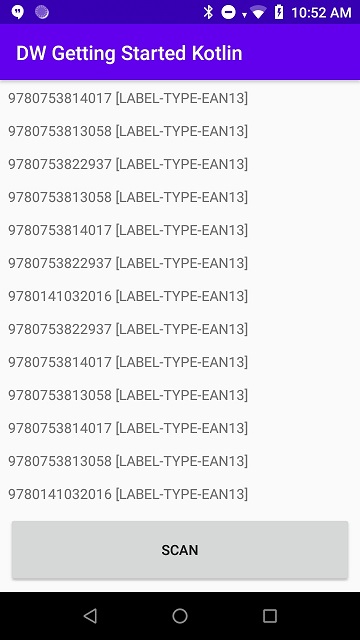
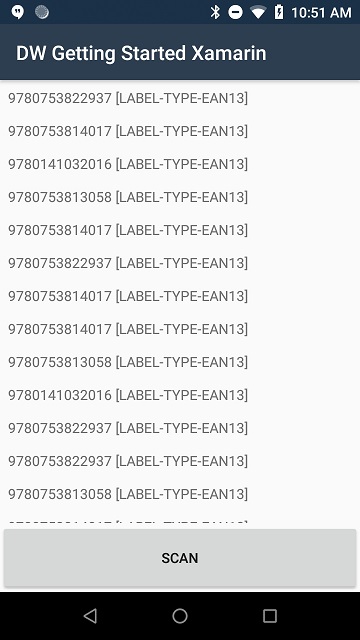
The scan data along with the decoder type (e.g. EAN8) is displayed on the UI
Java and Kotlin (AndroidManifest.xml):
android:launchMode="singleTop"
Xamarin (above the activity declaration):
LaunchMode=Android.Content.PM.LaunchMode.SingleTop)
Java:
@Override
protected void onNewIntent(Intent intent)
{
    super.onNewIntent(intent);
    String decodedData = scanIntent.getStringExtra(getResources().getString(R.string.datawedge_intent_key_data));
    String decodedLabelType = scanIntent.getStringExtra(getResources().getString(R.string.datawedge_intent_key_label_type));
    String scan = decodedData + " [" + decodedLabelType + "]\n\n";
    final TextView output = findViewById(R.id.txtOutput);
    output.setText(scan + output.getText());
}
Kotlin:
override fun onNewIntent(intent: Intent) {
    super.onNewIntent(intent)
    val decodedData =
        scanIntent.getStringExtra(resources.getString(R.string.datawedge_intent_key_data))
    val decodedLabelType =
        scanIntent.getStringExtra(resources.getString(R.string.datawedge_intent_key_label_type))
    val scan = "$decodedData [$decodedLabelType]\n\n"
    val output = findViewById(R.id.txtOutput)
    output.text = scan + output.text
}
Xamarin:
protected override void OnNewIntent(Intent intent)
{
    base.OnNewIntent(intent);
    String decodedData = scanIntent.GetStringExtra(Resources.GetString(Resource.String.datawedge_intent_key_data));
    String decodedLabelType = scanIntent.GetStringExtra(Resources.GetString(Resource.String.datawedge_intent_key_label_type));
    String scan = decodedData + " [" + decodedLabelType + "]\n\n";
    TextView output = FindViewById(Resource.Id.txtOutput);
    output.Text = scan + output.Text;
}
All samples use a very similar strings.xml, with only the intent filter changing from sample to sample:
    com.darryncampbell.datawedge.LANGUAGE.ACTION
    com.symbol.datawedge.source
    com.symbol.datawedge.label_type
    com.symbol.datawedge.data_string
Handling the Scan button
The sample applications include a button on the UI which, when pressed, will initiate the scanner beam (known as a 'soft scan'). The yellow trigger key will still work but this button also demonstrates how to use the DataWedge API.
Similar to the profile mechanism described previously, the DataWedge API is a powerful API designed to provide the same level of functionality that would be available to an app calling a native SDK. The API is Intent based and a more comprehensive guide is available on techdocs.
These sample apps make use of the SoftScanTrigger API to simulate a trigger press. Note that in each case an Intent is created and sent to the DataWedge service (listening for the appropriate action):
Java:
public boolean onTouch(View view, MotionEvent motionEvent) {
    if (view.getId() == R.id.btnScan)
    {
        if (motionEvent.getAction() == MotionEvent.ACTION_DOWN)
        {
            //  Button pressed, start scan
            Intent dwIntent = new Intent();
            dwIntent.setAction("com.symbol.datawedge.api.ACTION");
            dwIntent.putExtra("com.symbol.datawedge.api.SOFT_SCAN_TRIGGER", "START_SCANNING");
            sendBroadcast(dwIntent);
        }
        else if (motionEvent.getAction() == MotionEvent.ACTION_UP)
        {
            //  Button released, end scan
            Intent dwIntent = new Intent();
            dwIntent.setAction("com.symbol.datawedge.api.ACTION");
            dwIntent.putExtra("com.symbol.datawedge.api.SOFT_SCAN_TRIGGER", "STOP_SCANNING");
            sendBroadcast(dwIntent);
        }}
}
Kotlin:
override fun onTouch(view: View?, motionEvent: MotionEvent?): Boolean {
    if (view?.getId() == R.id.btnScan) {
        if (motionEvent?.getAction() == MotionEvent.ACTION_DOWN) {
            //  Button pressed, start scan
            val dwIntent = Intent()
            dwIntent.action = "com.symbol.datawedge.api.ACTION"
            dwIntent.putExtra("com.symbol.datawedge.api.SOFT_SCAN_TRIGGER", "START_SCANNING")
            sendBroadcast(dwIntent)
        } else if (motionEvent?.getAction() == MotionEvent.ACTION_UP) {
            //  Button released, end scan
            val dwIntent = Intent()
            dwIntent.action = "com.symbol.datawedge.api.ACTION"
            dwIntent.putExtra("com.symbol.datawedge.api.SOFT_SCAN_TRIGGER", "STOP_SCANNING")
            sendBroadcast(dwIntent)
        }}
}
Xamarin:
btnScan.Touch += (s, e) =>
{
    if (e.Event.Action == MotionEventActions.Down)
    {
        //  Button pressed, start scan
        Intent dwIntent = new Intent();
        dwIntent.SetAction("com.symbol.datawedge.api.ACTION");
        dwIntent.PutExtra("com.symbol.datawedge.api.SOFT_SCAN_TRIGGER", "START_SCANNING");
        SendBroadcast(dwIntent);
    }
    else if (e.Event.Action == MotionEventActions.Up)
    {
        //  Button released, end scan
        Intent dwIntent = new Intent();
        dwIntent.SetAction("com.symbol.datawedge.api.ACTION");
        dwIntent.PutExtra("com.symbol.datawedge.api.SOFT_SCAN_TRIGGER", "STOP_SCANNING");
        SendBroadcast(dwIntent);
    }
    e.Handled = true;
};
Putting it all together / Conclusion
These samples show how to configure DataWedge, receive data from the barcode scanner, process that received data and control the barcode scanner using the DataWedge API. For more information please refer to the DataWedge documentation
Manual DataWedge Configuration (Only required for DW 6.3 and below)
If your DataWedge profiles were not automatically created (as discussed in the earlier DataWedge Configuration section) then you will need to create them manually:
-
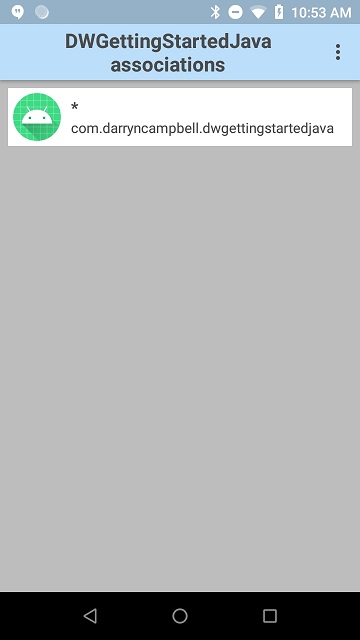
Create a new DataWedge Profile with any name
-
Associate that profile with the sample application you are going to run (Java, Kotlin or Xamarin)
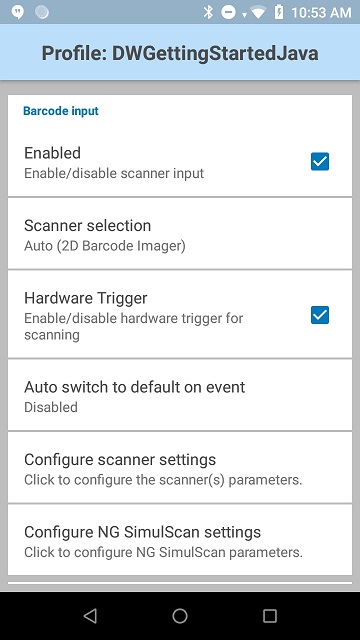
- Ensure the Barcode input is Enabled
-
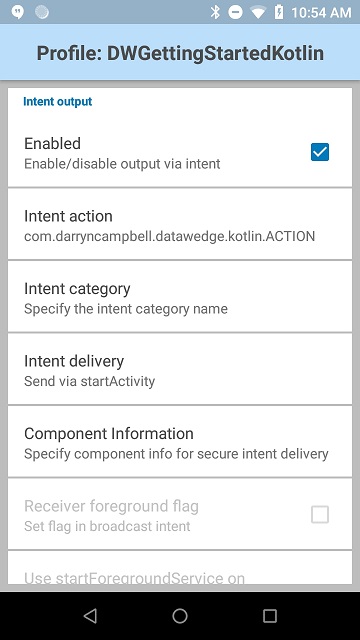
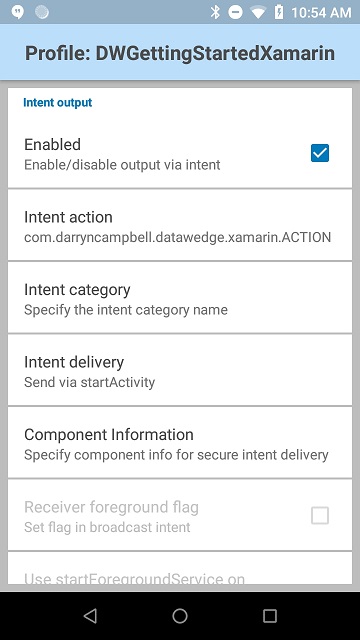
Enable the Intent output
-
Specify the action as either:
5a. "com.darryncampbell.datawedge.java.ACTION" for Java
5b. "com.darryncampbell.datawedge.kotlin.ACTION" for Kotlin
5c. "com.darryncampbell.datawedge.xamarin.ACTION" for Xamarin
- Specify the Intent delivery as "Send via StartActivity"

- DataWedge is now configured

Darryn Campbell
1 Replies
hi,
sorry, may be question is simple :
where / how is defined "scanIntent" of the "Listening for Scan Data" part please ?