
Using Dialogflow with Zebra Mobile Devices
Note: The sample application provided in this post depends on V1 of the DialogFlow SDK which has been marked as deprecated by Google, from May 31st 2020. The principles of Dialogflow remain the same but the sample app will not work after that date, see the sample app's readme for more information
Dialogflow, from Google, provides the ability to “build natural and rich conversational experiences” into your website or application, conceptually converting a user’s voice request into something you can action on your backend.
To learn more about dialogflow, you can visit the getting started page but I would personally recommend the Google codelab on ‘Build Actions for the Google Assistant (Level 1)’; that will give you all the foundation you need but there is also a more advanced codelab (Level 2) if you wanted to dive deeper.
Dialogflow offers a large number of SDKs. Be aware that there are two versions of the client libraries, V1 and V2 with the former being marked as “Legacy”.
With such a flexible system there are obviously many potential enterprise use cases that could be covered by integrating Dialogflow into an application that will run on Zebra devices.
I will run through my experience of creating a “Retail Assistant” that runs on a Zebra device and makes use of Dialogflow to respond to operator requests such as stock level enquiries or price lookup. The interaction will be as follows:
- User will ask the application a question in conversational language, e.g. “How much is this”. The dialogue exchange will be initiated with a button press, we will not be relying on ‘OK Google’.
- The device will prompt the user to give any additional required information, in the most basic case the prompt will just be “please scan barcode” but for more complex questions like “is this available in another store” the application may prompt the operator to specify a city or town.
- The device will return the answer to the operator’s query, for the example of “How much is this” the answer might be “five twentytwo”.
- Note, for simplicity we will be returning dummy data but you can imagine how this would integrate with a retailer’s inventory system.
The final project is available on my GitHub. Please note that the example application is provided without any guarantees or warranty. There are several device requirements to run the project:
- The device requires a Zebra mobile computer capable of running an EMDK application. Attempting to install this app on a non-Zebra device will fail to run, this is because of the scanner dependency.
- The device must have an internal imager scanner. There is no technical reason why you could not use a camera scanner for this app but to simplify the code I defaulted to the internal imager. All devices targeting the retail vertical have such a scanner.
- The device must have GMS services available, this provides our application with the speech engine.
- The device must have network connectivity to the external internet. In a real deployment this may require a new firewall rule but for this proof of concept I am running on an open network.
- The device must have a microphone and the application be granted recording permission (on Android Marshmallow, the user will be prompted to provide this permission).
- I have tested on a TC51 running Nougat but there is no reason why this would not work on any Zebra device running KK or higher so long as the above conditions are met.
You can download a prebuilt release apk from the GitHub releases page.
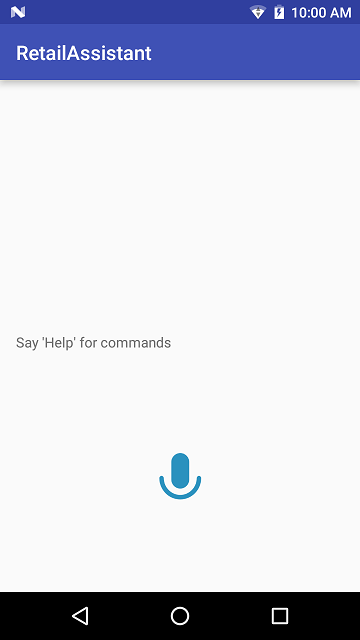
From the main activity press the microphone icon to interact with the app. Say “help” for a list of commands or try one of the below commands:
- "How much is this?"
- "What is the stock level?"
- "Is the item available at our Dallas store?"
- "When is a delivery due?"
- "Where does this go?"
For the purpose of this proof of concept all questions must be in English but Dialogflow is capable of far more languages, if correctly configured.
The device code and SDK
The full list of supported Dialogflow SDKs is provided on their docs site. All popular server side languages are supported however the client SDKs are limited to V1 of the client library; whilst I’m sure it would be possible to use the Java client in an Android app along with the Android speech APIs, like most developers I would rather start from a known working sample that I can build on. The Android client, though only supporting V1, works well and the sample app provided in the Dialogflow github repository is easy to understand and builds without issues.
It is an understatement to say that my retail assistant sample app was heavily influenced by the API sample app but to make the application work better on Enterprise devices I also integrated EMDK support to automatically enable the barcode scanner in response to a user question. To keep things easy to follow, the EMDK integration is largely a copy & paste of the Barcode API sample application.
Other than the text to speech class which was copied verbatim from the sample app, all of the main application functionality is exposed via a single activity.
Interaction with the voice recognition engine is handled entirely via the Dialogflow SDK and the application uses two interaction clients. "AIButton" is used to draw the microphone icon and respond when the users presses that button:
aiButton = (AIButton) findViewById(R.id.micButton);

final AIConfiguration config = new AIConfiguration(ACCESS_TOKEN,

        AIConfiguration.SupportedLanguages.English,

        AIConfiguration.RecognitionEngine.System);

test_cancel));

aiButton.initialize(config);

aiButton.setResultsListener(this);
The AccessToken is used to connect the client with the backend and can be obtained from the Dialogflow console after you have configured the agent. The barcode data is sent to the backend using an AIDataService, again provided entirely by the Dialogflow SDK:
aiDataService = new AIDataService(this, config);Data is returned to the application via the overridden onResult method, the most interesting thing we do here is to detect whether or not the backend is asking us to scan a barcode or not:
@Override

public void onResult(final AIResponse response) {

    //  Largely copied from dialogflow sample

...

            if (speech != null && speech.equalsIgnoreCase(PLEASE_SCAN_BARCODE)) {

                startScan();

            }

            else {

                stopScan();

            }

...
startScan() will immediately initiate a soft scan so the user does not need to press the hardware trigger.
In response to a barcode scan the scanned data is sent to the backend using the previously created aiDataService as follows:
//  Not worrying about different languages or contexts

final AIRequest request = new AIRequest();

String query = params[0];  //  barcode data is in params[0]

request.setQuery(query);

RequestExtras requestExtras = null;

try {

  return aiDataService.request(request, requestExtras);

} catch (final AIServiceException e) {

  aiError = new AIError(e);

  return null;

}
Fortunately, the Dialogflow agent on the backend does not care whether it receives input from the aiButton or aiDataService, this allows us to mix the two and provide barcode data as part of the conversation exchange.
- [User presses mic button]
- User: “How much is this?”
- [Query sent to backend & response received]
- Device: “Please scan barcode”
- [Barcode scanner is activated]
- [User scans barcode, data is sent to backend]
- Device: “Price is 5 22”
The server code and project
The server component for the Retail assistant is provided as an ‘Agent’ and consists of 5 ‘Intents’ to cover the required interactions. The Intents themselves are very simple, merely scratching the surface of what is possible with Dialogflow. Each Intent is designed along similar lines: training phrases are provided, and a required numeric parameter is configured. The required parameter represents a barcode and because the user does not provide one in the initial interaction, Dialogflow will automatically prompt the user to “Please scan barcode”
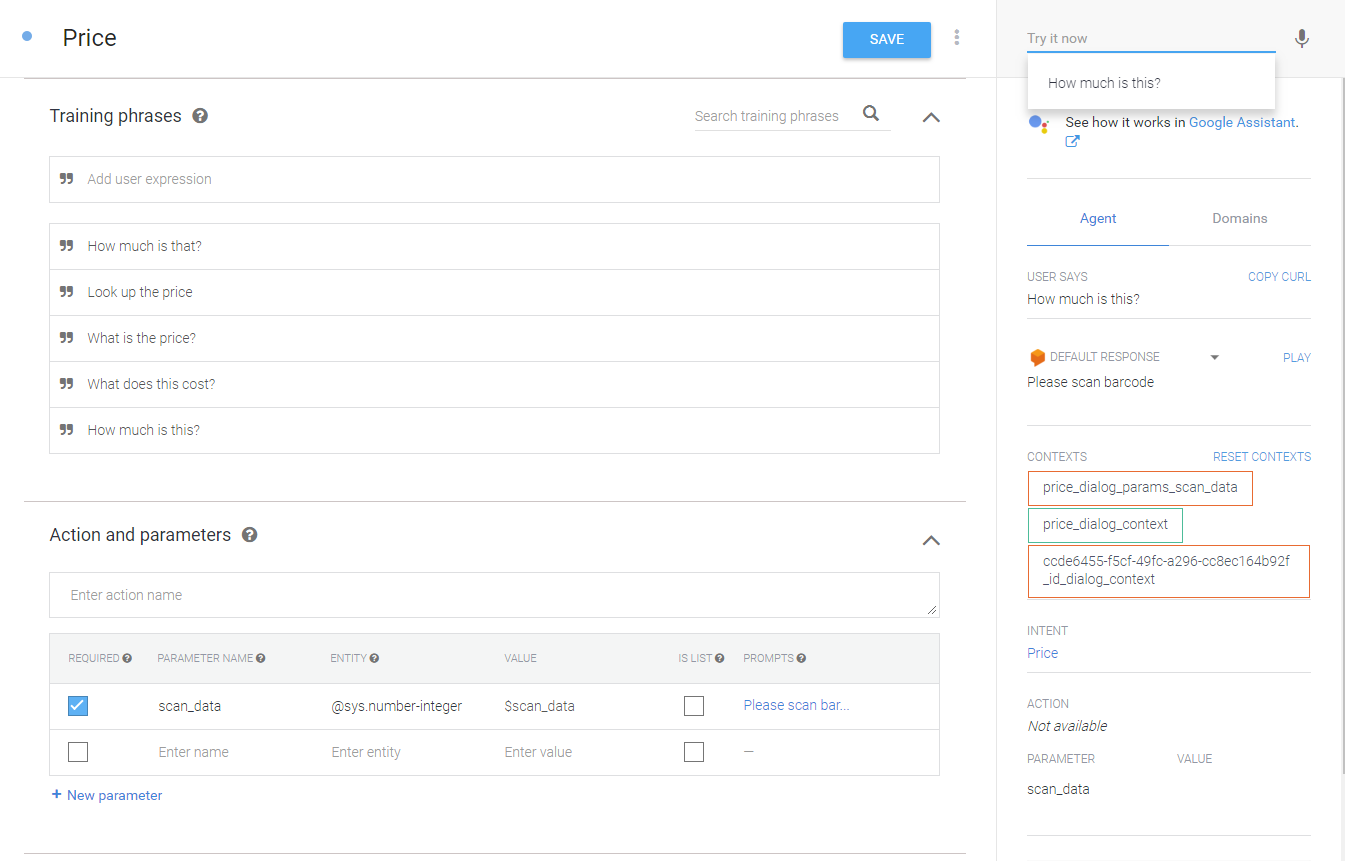
The above screenshot shows the price lookup Intent, i.e. the intent which responds to questions like “how much is this?” detailing the training phrases, required scan_data parameter and an example test interaction on the right-hand side, responding “Please scan barcode” in response to the question “How much is this?”.
Each intent is fulfilled with a webhook provided by cloud functions for Firebase.
The backend implementation is very simple, each intent is mapped to a corresponding nodejs function and the functions return dummy data based on the barcode value, this means the same barcode will return consistent values whilst scanning different barcodes return different values.
Obviously if this were a real Retail Assistant the functions here would authenticate with and call private APIs exposed by the retailers existing stock systems. Dialogflow also offers Webhooks if existing systems expose REST APIs.
Since the client API uses V1 of the APIs, it is necessary to configure the backend to communicate with this API version, this can be done from the general settings for the agent.
'use strict';

const functions = require('firebase-functions');

const {WebhookClient} = require('dialogflow-fulfillment');

const {Card, Suggestion} = require('dialogflow-fulfillment');

var pad = require('pad');


process.env.DEBUG = 'dialogflow:debug'; // enables lib debugging statements


exports.dialogflowFirebaseFulfillment = functions.https.onRequest((request, response) => {

  const agent = new WebhookClient({ request, response });

  console.log('Dialogflow Request headers: ' + JSON.stringify(request.headers));

  console.log('Dialogflow Request body: ' + JSON.stringify(request.body));


  function welcome(agent) {

    agent.add(`Welcome to my agent!`);

  }


  function fallback(agent) {

    agent.add(`I didn't understand`);

    agent.add(`I'm sorry, can you try again?`);

}


  function priceLookup(agent) {

      const param = agent.parameters.scan_data;

      var paramPadded = pad(param, 10, "2");

      var major = paramPadded.substring(5, 6);

      var minor = paramPadded.substring(6, 8);

      var price = "" + major + " " + minor;

      agent.add(`Price is ${price}`);

  }


  function stockLookup(agent) {

      const param = agent.parameters.scan_data;

      var paramPadded = pad(param, 10, "2");

      var stock = "" + paramPadded.substring(6,7);

      agent.add(`There are ${stock} of these in stock`);

  }


  function locationLookup(agent) {

      const param = agent.parameters.scan_data;

      var paramPadded = pad(param, 10, "2");

      var aisle = "" + paramPadded.substring(5,6);

      var shelf = "" + paramPadded.substring(6,7);

      agent.add(`This item belongs in aisle ${aisle} on shelf ${shelf}`);

  }


  function deliveryLookup(agent) {

      const param = agent.parameters.scan_data;

      var paramPadded = pad(param, 10, "2");

      var day = parseInt(paramPadded.substring(4,5), 10);

      var weekday = new Array(7);

        weekday[0] =  "Sunday";

        weekday[1] = "Monday";

        weekday[2] = "Tuesday";

        weekday[3] = "Wednesday";

        weekday[4] = "Thursday";

        weekday[5] = "Friday";

        weekday[6] = "Saturday";

        weekday[7] = "Sunday";

        weekday[8] = "Monday";

        weekday[9] = "Tuesday";

      agent.add(`New stock of this item is due next ${weekday[day]}`);

  }


  function otherStoreLookup(agent) {

      const param = agent.parameters.scan_data;

      const storeParam = agent.parameters.store;

      var paramPadded = pad(param, 10, "2");

      var stock = "" + paramPadded.substring(4,5);

      var isAtStore = parseInt(paramPadded.substring(4,5), 10) >= 3;

      if (!isAtStore)

        agent.add(`This item is not available at the ${storeParam} store`);

      else

        agent.add(`This item is available at the ${storeParam} store and there are ${stock} in stock`);

  }


  // Run the proper function handler based on the matched Dialogflow intent name

  let intentMap = new Map();

  intentMap.set('Default Welcome Intent', welcome);

  intentMap.set('Default Fallback Intent', fallback);

  intentMap.set('Price', priceLookup);

  intentMap.set('Stock', stockLookup);

  intentMap.set('WhereGo', locationLookup);

  intentMap.set('WhenAvailable', deliveryLookup);

  intentMap.set('OtherStoreAvailability', otherStoreLookup);

  agent.handleRequest(intentMap);

});
In conclusion, the final client project is available on my GitHub page or you can download the apk directly from the GitHub releases page. This application was designed solely as a proof of concept but hopefully this has shown what Dialogflow can do to augment enterprise use cases with voice.
Addendum: Jon Markoff, a Developer Advocate at Google gave a talk on "Voice and assistant in the enterprise" at Droidcon Berlin 2018. It is a good entry-level presentation on the feature & worth checking out if you are just getting started: https://www.youtube.com/watch?v=AcFnn8N6W2M

Anonymous (not verified)
Dfghjkjjn

2 Replies
Thanks for sharing Kapil, that is very interesting. Is it OK to share that link externally though?
It's very nice and well explained blog Darryn!...
We Showcased this in Srjana-2017.
MODERATOR EDIT: Removed video link.