
Getting started with the ZSFinder SDK in an Android project
Overview
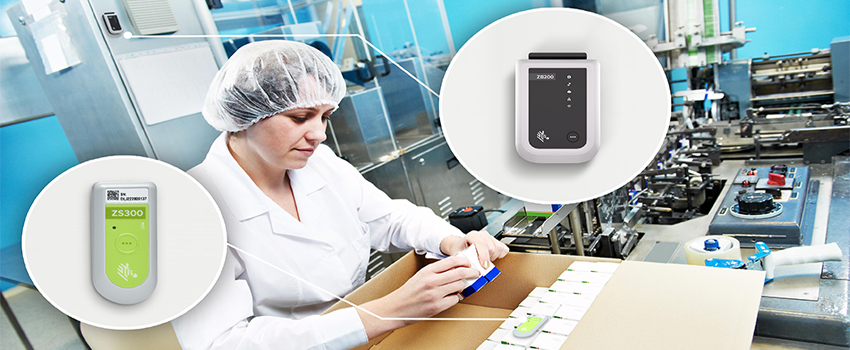
A couple of months ago, we introduced our new newest generation of electronic temperature sensors with a set of REST APIs that can be implemented and used for data reporting tasks and management of these sensors.
On top of this, we've also released the ZSFinder app on the Play Store and on our Zebra Support Portal which is important for both users and developers for 2 reasons:
- It will act as a bridge to upload to the cloud the recorded data by the sensors when a ZB200 physical bridge is not available.
- Since the application is running as a foreground service once launched, it will also scan periodically for sensors nearby allowing 3rd party applications to connect to them.
When downloading and installing the app, you will notice an issue as the API Key is not set. We don't need to worry about that - an API Key is only required when using the ZSFinder as a bridge for the sensors, which is not a part of this tutorial.
If you're interested in learning more about using the available APIs, you can check out this blog post.
Also, everything that we're going to document in this blog post in terms of code can be found in the full demo application available under this repository on Github.
Include the ZSFinder AIDL interfaces
The very first thing we'll need to do is to download the AIDL interfaces which will be used to communicate with our sensors and they can be found at the same link where we download the ZSFinder app on the Zebra Support Portal.
If you're wondering what AIDL means, it stands for Android Interface Definition Language and it is a way to define a programming interface that both the client and service agree upon in order to communicate with each other using interprocess communication. In this case, the communication would happen between our application and the ZSFinder Service to connect to the sensors to gather data.
Once we have downloaded the zip, you will find in the folder the apk to install the ZSFinder service, documentation, and also the AIDL interfaces to be included in our Android project.
We'll be looking at 2 different AIDL files:
- IZebraSensorService - which will contain the methods to communicate with the ZSFinder service
- IZebraSensor - which will contain all the available methods to communicate directly with a sensor and get specific data such as MAC address, current temperature etc...
You'll notice these 2 files to be under a specific package name and it's important to mention that the same one should be kept also when moving the files inside our project.
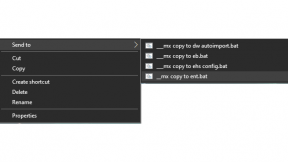
To move the files, create a new directory called aidl inside your src/main directory of the project and when this is done, just give a Gradle sync so that these files get indexed and we're ready to go!
Bind ZSFinder Service
For the sake of this blog post, we will use Kotlin as the programming language for the snippets of code but if you're more comfortable with Java you can refer more to the available documentation in the zip which we've downloaded earlier, or if you're looking to use the AIDL interfaces inside a Xamarin Project you can also refer to this guide which is going to help you understand more on how to bind a service, in terms of syntax it is going to be fairly similar like how we're going to do it for a native Android project.
Also, we'll be using an MVVM architecture with the use of ViewModels and Coroutines so I'm going to assume you already know these concepts a little bit, but if neither of these ring a bell and you feel unfamiliar, just have a look at the snippets of code and then implement them in your project like you're used to or how the rest of your project requires it.
Binding the Zebra Sensor Service is a preliminary task that will be required every time we want to use one of the available methods to communicate with our sensors. So, let's start first by defining the ZebraSensorService interface in our activity:
private var mZebraSensorService: IZebraSensorService? = null
Now, let's implement the ServiceConnection interface which will later be used when we'll bind the service. This will allow us to monitor the states of the Zebra Sensor Service, for example whenever we get confirmation that it's connected or when the connection gets terminated for a specific reason.
private val sensorServiceConnection: ServiceConnection = object : ServiceConnection {
    override fun onServiceConnected(componentName: ComponentName, iBinder: IBinder) {

    }

    override fun onServiceDisconnected(componentName: ComponentName) {

    }
}
What we're left to do now is to create a new method that will be used to launch our intent to try to bind to our Zebra Sensor Service:
private fun bindZSFinderService() {
    val intent =
        Intent(IZebraSensorService.BIND_SERVICE_ACTION)
            .setPackage(IZebraSensorService.BIND_SERVICE_PACKAGE)
    bindService(intent, sensorServiceConnection, BIND_AUTO_CREATE)
}
If you've done everything correctly, you should land under the onServiceConnected method from the ServiceConnection interface we've implemented earlier. Now, from the same method, we will need now to use the returned IBinder to create our IZebraSensorService instance and assign it to the local variable we've created at the beginning. Also, make sure you're always checking whether the device is compatible with the service. It will add a further layer of security before actually using any methods of the service.
override fun onServiceConnected(componentName: ComponentName, iBinder: IBinder) {
    mZebraSensorService = IZebraSensorService.Stub.asInterface(iBinder)

    if (mZebraSensorService != null && mZebraSensorService!!.isClientCompatibleWithService(
            IZebraSensorService.VERSION,
            IZebraSensorService.REVISION
        )
    ) {
           Toast.makeText(this@MainActivity,
                "Successfully connected to ZSFinder Service!",
                Toast.LENGTH_LONG
           ).show()
           registerForServiceEvents()
      }
}
Another thing is to be careful with the management/lifecycle of the service and remember to unbind it whenever the application or the activity gets closed (Depending by the architecture of your app). To do that, I would recommend unbinding the service in the onDestroy() or onPause() state of the activity and then binding it again in the onCreate() or onResume() state.
private fun unBindZSFinderService() {
    unbindService(sensorServiceConnection)
    unregisterReceiver(sensorServiceEventsReceiver)
}
Listening for Service Events
Now that we've successfully bound the service, we can start creating the BroadcastReceiver which will be used for all the incoming events from the ZSFinder Service. This is really important because this is going to be the only way we'll be able to check the status of the discovery process. As I mentioned at the beginning this scan operation is being done periodically by the service to get the available sensors nearby our device. Without registering this BroadcastReceiver we will not be able to connect to any of the discovered sensors and this is because the receiver will send us a particular event every time the discovery process ends with a list of the available IDs referring to the discovered sensors.
There are different events that can be tracked and you can refer to the actual documentation to learn more about the other statuses but in our case, we'll be focusing only on 2 of them which are the ACTION_DISCOVERY_STARTED and the ACTION_DISCOVERY_FINISHED
To register the BroadcastReceiver we'll add the actions which we want to track as follows:
It can be registered whenever you like, my recommendation is to keep it active only when we're certain that the service has been bound correctly and then unregister it whenever we leave the activity.
private fun registerForServiceEvents() {
    val filter = IntentFilter().apply {
        addAction(IZebraSensorService.ACTION_DISCOVERY_ERROR)
        addAction(IZebraSensorService.ACTION_DISCOVERY_FINISHED)
        addAction(IZebraSensorService.ACTION_DISCOVERY_STARTED)
        addAction(IZebraSensorService.ACTION_DISCOVERY_FOUND_SENSOR)
        addAction(IZebraSensorService.ACTION_DISCOVERY_ERROR_PERMISSIONS)
        addAction(IZebraSensorService.ACTION_DISCOVERY_PAUSED)
        addAction(IZebraSensorService.ACTION_DISCOVERY_UNPAUSED)
        addAction(IZebraSensorService.ACTION_DISCOVERY_ERROR_MISSING_AUTH_TOKEN)
        addAction(IZebraSensorService.ACTION_DISCOVERY_ERROR_INVALID_AUTH_TOKEN)
    }
    registerReceiver(sensorServiceEventsReceiver, filter)
}
private val sensorServiceEventsReceiver: BroadcastReceiver = object : BroadcastReceiver() {
    override fun onReceive(context: Context, intent: Intent) {
        Log.d(TAG, "Logging Event Action from SensorService: ${intent.action}")
        if (intent.action == IZebraSensorService.ACTION_DISCOVERY_STARTED) {
            Toast.makeText(
                this@MainActivity,
                "Discovery process has started..",
                Toast.LENGTH_LONG
            ).show()
        }

        if (intent.action == IZebraSensorService.ACTION_DISCOVERY_FINISHED) {
            Toast.makeText(
                this@MainActivity,
                "Discovery process has finished",
                Toast.LENGTH_LONG
            ).show()

            val discoveredSensors = mZebraSensorService?.lastScanDevices!!
        }
    }
}
Then, from the created receiver we will intercept the 2 actions we've mentioned earlier. In this case, it's up to you how to monitor the state and how to update your UI while waiting for the discovery process to finish. Typically the discovery process takes around 30 seconds to complete and it's running independently regardless of the application process, which means that even if you open the application for the first time you could get in a situation where the discovery process might have started already.
Also, there's a limitation where the current threshold can't be changed, which means that the application will need to wait every time for those 30 seconds to elapse before actually connecting to one of the discovered sensors.
When we do get to the situation where the discovery process has finished, by using the getLastScanDevices method from the created IZebraSensorService we can then get the list of the IDs of the discovered sensors and later use it to connect to one of them.
Connecting to a sensor and retrieving info
Once you get that list, it is pretty straightforward to connect to one of the sensors, and for that, we will be using the getSensor method which will accept as a parameter the ID of the discovered sensor.
fun getSensor(sensorId: String): IZebraSensor? {
    return mZebraSensorService?.getSensor(sensorId)
}
Another thing to keep in mind is that you can't connect to a sensor while the discovery process is running, so you will have a window of 30 seconds to pick one of the sensors to which you want to connect. So, if the service is not currently looking for sensors nearby you should be able to properly connect.
The returned object will be an IZebraSensor interface which will directly be referenced to the sensor with the associated ID. And with this, we can now finally retrieve all the valuable information that we're interested in.
I'm not going to list all the possible info which you can retrieve because this has been treated already in the official documentation, so you can find over there or in the IDE all the available methods which can be used. This info can be retrieved by simply invoking the methods even on the main thread, but there are going be two in specific which will have to be executed on an IO thread because there's a big chance that they will block the main thread for some time, depending also by the performance of the device and in this case we're talking about the readTemperature and the readTemperatureSamples methods.
Retrieve recorded temperatures from a sensor
To retrieve the recorded temperatures of a sensor we're connected to, we'll need to ensure first of all that it is currently assigned to a task, otherwise, we will not get any results. Also, because of the current limitation of the AIDL interfaces, we cannot get the timestamp of a recorded temperature meaning that only the crude values will be returned by the readTemperatureSamples method.
As we've mentioned earlier, since this method will block the current thread, we will use a simple coroutine which will help us to run the method on an IO thread. This snippet of code has been taken from a ViewModel class, so if you want to understand more about how this has been done, just refer to the sample code project on GitHub.
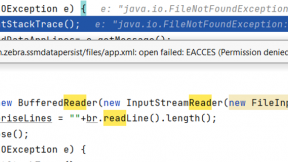
The first thing to do in the coroutine builder is to wrap everything with a try-catch block because it could happen that the temperatures can't be retrieved and an exception will be thrown in that case. The method will return an array of float values indicating the recorded temperatures and, in a situation where the sensor is not being used for a task, the array will be empty so this needs to be handled as well. Since we want to show these values to the user in a pleasant way, we will be adding break lines for each recorded value so that it will be easier to read.
Once all the recorded temperatures have been obtained we will return to the activity or the fragment the final formatted string with all the values.
val recordedTemperatures: MutableLiveData<String> by lazy {
    MutableLiveData<Event<String>>()
}

fun getRecordedTemperaturesForSensor(sensor: IZebraSensor) {
        viewModelScope.launch(Dispatchers.IO) {
            var recordedTemperaturesTxt = ""
            try {
                val recordedTemperaturesArray = sensor.readTemperatureSamples()

                if (recordedTemperaturesArray.isEmpty()) {
                    recordedTemperaturesTxt = "0"
                } else {
                    recordedTemperaturesArray.forEach {
                        recordedTemperaturesTxt = recordedTemperaturesTxt + it.toString() + "\n\n"
                    }
                }
            } catch (ex: Exception) {
                recordedTemperaturesTxt = "0"
            }
            recordedTemperatures.postValue(recordedTemperaturesTxt)
        }
    }
Retrieve current temperature from a sensor
Getting the current temperature from a sensor will definitely be a much easier task than getting the recorded temperatures but we will need to be careful also in this case about possible exceptions which can be thrown, so be sure you're wrapping everything in the coroutine builder before using the readTemperature method. Usually, we should every time get a value from this method but if for any reason we end up with an exception we will need to handle it with a default value and return it back to the activity or the fragment. In this case, we're using the minimum available float value but it can be any value by your choice.
fun getCurrentTemperatureForSensor(sensor: IZebraSensor) {
        viewModelScope.launch(Dispatchers.IO) {
            try {
                currentTemperature.postValue(Event(sensor.readTemperature()))
            } catch (ex: Exception) {
                currentTemperature.postValue(Event(Float.MIN_VALUE))
            }
        }
    }
Conclusions
The AIDL interfaces for the ZSFinder service are representing the starter kit for anyone wanting to get into the development for these new sensors. They provide useful methods to communicate directly with a sensor rather than using the APIs and at the same time we can use the ZSFinder service to retrieve all the sensors nearby. Hopefully, this blog post and the demo application will help you a little bit more to understand the documentation and how to get started in a new or existing project.
Happy coding!

Daniel Neamtu


2 Replies
Very insightful article! Great job Daniel in helping developers build an Android solution around ZS300.
Thanks Ankan!