
SendTo ZTools2 - Easily Create Zebra Lockdown Configurations
Intro:
These SendTo shortcuts provide a convenient and easy way to auto-generate a lockdown configuration for Zebra Android 11 (and later) devices. The lockdown is performed via Mx XML documents which can either be processed locally on the device or pushed to devices via an EMM OEMConfig profile.
General Notes:
- these shortcuts require that the filenames and file paths for any file which is selected for processing via SendTo do not contain spaces i.e. either delete or replace any spaces with underscore before use.
- The shortcuts mainly use ADB to communicate with the device so the device has to have ADB enabled before using these tools
- On Windows 11 , the right click menu is shown as a condensed list by default but can be changed to the full list (recommended) using the method detailed here: https://answers.microsoft.com/en-us/windows/forum/all/windows-11-right-click-explorer-menu-show-more-as/ba8dafe4-306a-403b-af0d-10a6d1ca0a9a
- These shortcuts are unofficial utilities which are not supported by the Zebra Support Centre i.e. use at your own risk.
- A video showing the use of these shortcuts to lockdown a device in less than 5 mins is posted here for reference: https://drive.google.com/file/d/1OzMcKpoN3qNdYdXHf2NKU2iWlIteaOc3/view?usp=sharing
- This blog follows on and expands on a previous article detailing additional SendTo shortcuts: How to use SendTo ZTools1 Shortcuts with Zebra Devices | Developer Portal
Installation
- Download zip file from: https://drive.google.com/drive/folders/1wzNXZn4E1W5XkTujnsXdPEVr-pFHz0Eq?usp=sharing
- Extract all files from sendto ztoolsv2.zip to the SendTo folder on your PC (access by Win+R, type shell:sendto and press enter) preserving the sub-folders
- Ensure ADB is added to the system path (may require PC reboot after modifying the PATH in order to make it effective)
- Extract all files from qtile config.zip to a working folder for Quick Tile configuration
Usage : Starting from a Factory Reset Device
- Enable ADB
- Install the snexport_tester v2.0 utility from here: Testing XML Exported from StageNow before EMM Deployment | Developer Portal (zebra.com)
Run the utility and select either the XML or JavaScript barcode format depending upon the OS ( Android 13 currently requires JS barcodes)

- Connect the target device to a PC , run the StageNow client and read the ‘Enable ADB’ barcode to enable ADB (also requires confirmation on the device side)
2. Persistently Install APK files – this will copy the APK files to the /enterprise/usr folder and create the XML required to install the files from this location and persist the installation over an Enterprise Reset (ER) i.e. so that the apps are automatically reinstalled following an ER
- Select all the APK files required to install
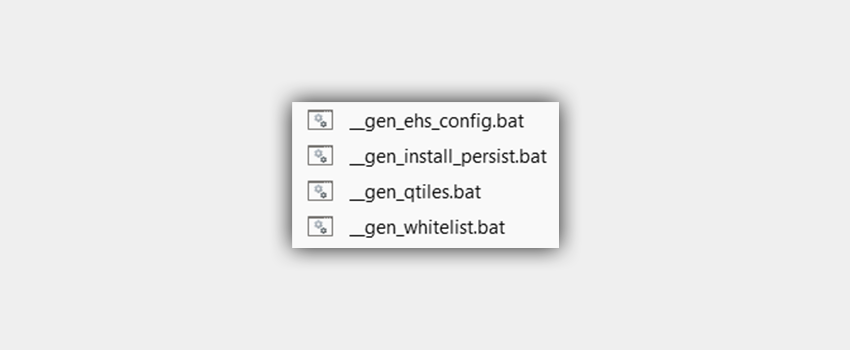
- Right click and select gen_install_persist
- APK files will be pushed to the device and a file named app_persist.xml will be created in the current folder and also pushed to /sdcard/myxml.xml. This file contains the XML required to install the APK files persistently
- To process the XML, launch the StageNow client and read the ‘Process myxml.xml’ barcode from the XML Tester utility to process /sdcard/myxml.xml
3. Implement application whitelist – this will prevent any non-whitelisted apps from being installed on the device via ADB or any other method.
- Follow step (2) to install all the APK files required on the device
- Select any file (the file is not used by the shortcut), right click and select gen_whitelist
- This will create a file named whitelist.xml in the current folder and also push it to /sdcard/myxml.xml. This file contains the XML required to add the APK files to the whitelist and persist this configuration over an ER
- To process the XML, run StageNow and read the ‘Process myxml.xml’ barcode from the XML Tester utility to process /sdcard/myxml.xml
- Try to install an additional APK file via ADB – the following message should be seen which confirms that the whitelist is effective:

- Disable SafeMode – the XML required to disable SafeMode access is already included in the whitelist XML so does not have to be applied separately. Once installed , this XML configuration will disable the powerkey menu option to reboot to SafeMode which is recommended as it can provide a backdoor for putting the device into Flight Mode and/or changing the default launcher.
4. Configure restricted Settings access via Quick Tiles (requires Mx 11.3 onwards)
- Create a working folder containing the QuickTile definitions extracted from qtile_config.zip
- In this folder, highlight the required QuickTiles
- Right click and select gen_qtiles
- This will create a file named qtile.xml in the current folder and also push it to /sdcard/myxml.xml. This file contains the XML required to restrict the QuickTIles to those selected and persist this configuration over an ER. It also includes XML to disable the Settings icon in the Notification pulldown and disable the Settings Search function as per the screenshots below:


- To process the XML, launch the StageNow client and read the ‘Process myxml.xml’ barcode from the XML Tester utility to process /sdcard/myxml.xml
- Pull down the notification bar and check that the icons shown are those which were configured.
5. Auto-generate an Enterprise Home Screen configuration file - creates a EHS config file (enterprisehomescreen.xml) containing all the user installed apps on the connected device
- Install all required apps on the connected device
- Right click on any file (the selected file is not used by this shortcut) and select gen_ehs_config
- This will generate enterprisehomescreen.xml in the current folder containing the app definitions for each of the installed applications. This config file is designed for use with EHS 4.x or later and includes a Tools menu option to SetDefaultLauncher which will allow a rapid exit from EHS ( for test+demo purposes). The file will also be transferred to the /enterprise/usr folder on the device via ADB.
- Start EHS in order to see the new configuration
After making the above configuration , you can perform an Enterprise Reset and the same lockdown config will be reinstalled automatically when the device boots up.

Ian Hatton


0 Replies