Using Genehs Process to Quickly Create Persistent Enterprise Home Screen Deployments
Using genehs process to quickly create persistent Enterprise Home Screen deployments v1
Ian Hatton
Zebra EMEA , November 2021
Overview
This unofficial/unsupported utility is designed to allow fast creation of persistent EHS Deployments for demonstration and customer deployment. The utility allows applications (which have already been installed on a device) to be automatically included in an EHS configuration which includes :
- enterprisehomescreen.xml – this is the configuration file for EHS
- the required files to redeploy EHS i.e. the EHS app itself and associated files
- the customer APK’s and the XML required to auto reinstall everything following an enterprise reset
- a custom wallpaper image to be included as the background for the EHS installation . When EHS starts initially, the wallpaper image will be automatically watermarked with key information about the host device including the MAC address, OS Build and IMEI Number (WAN devices only)
- Optionally the Mx XML required to whitelist the installed apps – this will prevent any additional apps from being installed on the device
Example Screenshots showing different wallpapers and device info watermarking


Method
- Cleanboot the target device and then enable ADB and install the required customer app(s)
- Download the required utilities from this link: https://airsetup.uk/airsetup.uk/airbeam/zebra/2021/security_devtalk/security_devtalk_v1.zip
- Unzip the utilities to a local working folder on your PC e.g. /genehs
- Check that device has a usable ADB connection to device and then from the working folder, run the genehs.bat file to create the required files . When prompted for a projectname via the screen below, enter a name which will be used to create a sub-folder under working folder with the same name (containing the project files):

- If whitelisting is required (in order to prevent additional apps from being installed on the device) then check the ‘use Whitelist’ option . This will include the required Mx AccessMgr code in the generated XML.
- Press the Process button after completing the projectname and you should see the dialog below with confirmation of creation of the projectfolder.


- The device will now be running EHS with the previously installed apps added to the EHS launcher as per the sample screen below

- This EHS installation is not persistent currently so it will be removed if the device is Enterprise Reset. In order to persist the installation, run the apk_copy.bat file from the projectfolder in order to persist the APK files and then process the apk_persist.xml file in order to install the required XML to reload EHS and the customer apps after an Enterprise Reset. To process the XML, use the following ADB command to copy it to the device and then run StageNow and scan the barcode below:
Adb push apk_persist.xml /sdcard/myxml.xml

- To check persistence, perform an Enterprise Reset using the StageNow barcode below:

- After following these steps, the required EHS + apps files should be installed and ready to use. To change the wallpaper, prepare a PNG file with the same dimensions as the default (zebra_lg.png) , copy the file to the projectfolder and then push it to the device via the following ADB commands:
Adb push mywallpaper.png /enterprise/usr/zebra_lg.png
Adb push mywallpaper.png /sdcard/zebra_lg.png
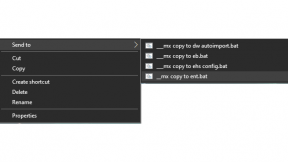
You can then either reboot the device to install the new wallpaper or from the EHS Tools menu below, run A10 Info first (to watermark the wallpaper) and then RefreshEHSConfig to apply the new wallpaper

- By default all the utilities in the screenshot above will be available via the Tools menu but this can be changed if required by editing the template file footer.txt in the genehs installation folder. This file contains all the EHS settings apart from the apps added by the ehs_builder utility and any of the default settings such as the password can be changed here and will subsequently be included in any generated projects.
- After test/demo , the installed configuration can be removed using the StageNow barcode below which will use PersistMgr to delete the persistent profile ‘apps’ . The XML contained in this file is in the file ‘delete_persist.xml’ in the genehs folder.

Optional Feature : Installing Zebra Licences via the Zebra Cloud Licence server
One of the optional utilities included with genehs in the ‘licencing’ folder is called ProductionLicenseInstallerv1.0.apk (also has a test version called UATLicenceInstallerv1.0.apk for Zebra use) . If this app is installed on the device before running the genehs batch file to create the EHS configuration , it will provide an automated method of installing Zebra software licences from the Cloud server (requires network access to the server to be available on the device) whenever the device is clean booted. The utility works as follows:
- If installed, EHS will run the app automatically on initial boot. If you are using the ProductionLicenceInstallerv1.0.apk version (for customer deployments)
- App checks for the presence of the file /enterprise/usr/licence.txt which should contain at least one Activation ID previously allocated to this device.
- If found , app will apply the licence to the device using Mx LicenceMgr which will install all licences currently allocated to that device
- App will exit after installation
This app avoids any issue with either Mx and/or IP connectivity not being available immediately after an enterprise reset since EHS will delay the start of the app until Mx has been fully initialized.

Ian Hatton
2 Replies
This is really good info.
A technique we use to disable EHS kiosk mode within our apps on our MC33XX:
Scan a special QRCode into the app. If seen, we send an intent like this:
Intent intent1 = new Intent("com.symbol.enterprisehomescreen.actions.MODIFY_KIOSK_MODE");
intent1.putExtra("enable",false);
sendBroadcast(intent1);
This makes it quick and easy for us to be able to exit kiosk mode to add or update software or do what we need to with just a 'secret barcode'. We usually add a couple of backdoor ways to do this in case the scanner fails, etc.
A tiny PC software is offered to streamline this procedure and provide syntax checking of any XML document updates performed prior to deployment. <a href="https://cookie-clicker2.co">https://cookie-clicker2.co</a>