
GETTING STARTED WITH ZEBRA DATA SERVICES
Please note, Many of the links on this page will not be accessible unless you login. Please do so first to to interact with the APIs and Data Services.
Login
Register and login to the Developer Portal to see the full set of what we have available.
Choose a Plan
In order to ensure that all Data Services customers understand the terms and conditions, you must choose a plan or plans for the APIs you want to use. Many APis have free plans availilble, while others have paid plans. The catalog and details will tell you what is availble and how much aach option costs. Purchasing a plan will not require you to pay any money up-front unless it is a subscription plan. We are not looking for a credit card in this step.
Be sure to read and follow this entire section!
- Go To the Zebra Data Services page of the site and click the PLANS link.
This allows you to view the package catalog.

- Select the plan you think will best meet your needs. You can go back to this step and add more later.
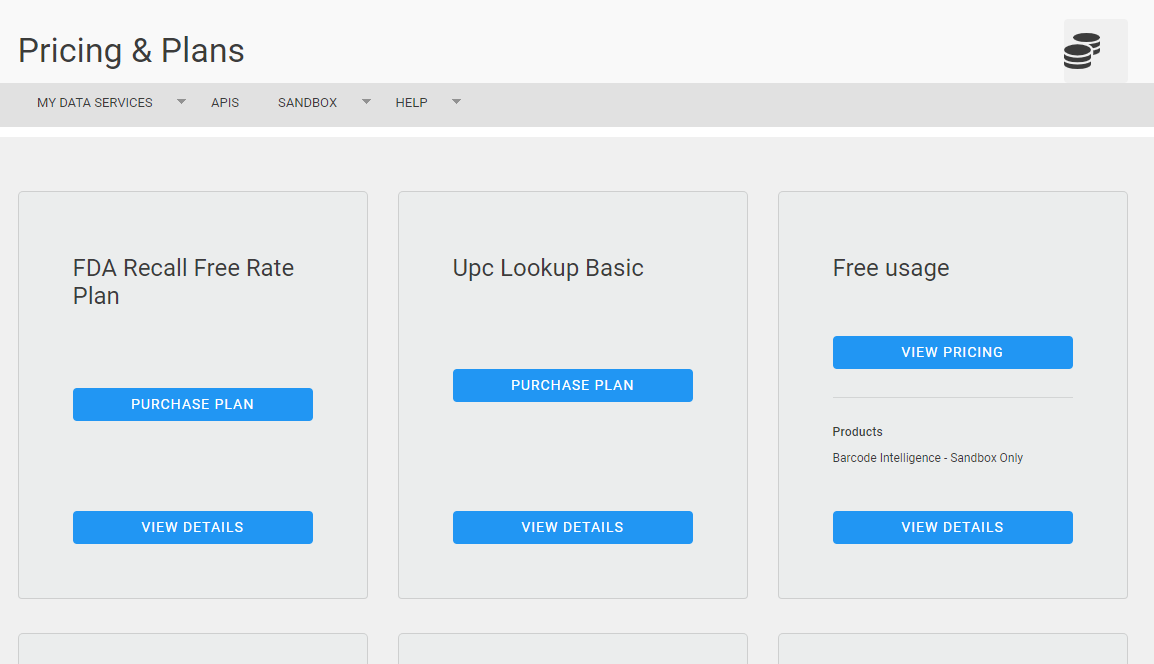
- Review the Package and Plan details.
- At the bottom of this page, if this is the first time you have added a package, you will see a link the Terms & Conditions page. Click the link. If you have already done this, skip to step 6.
- Review the T&C document and select Accept. It will return you to the Plan detail page.
- Select a date when you want the plan to start. At this date you will start using your trial services usage of paid plans.
- Click Purchase.
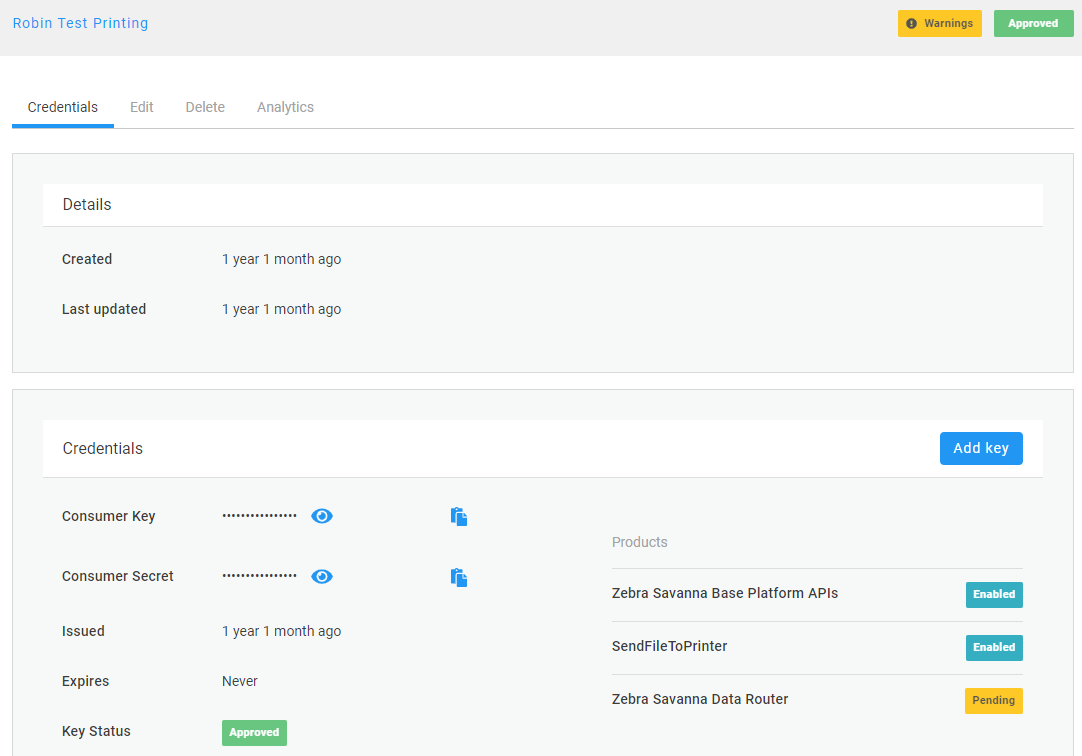
Get an App Key
An APP Key is needed to use and test all the Zebra Data Services APIs.
Be sure to read and follow this entire section!
- Log into the Zebra Developer Portal (See Above).
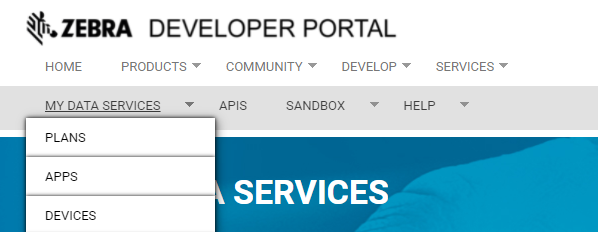
- Go To the Zebra Data Services page of the site and click the APPS link.
-
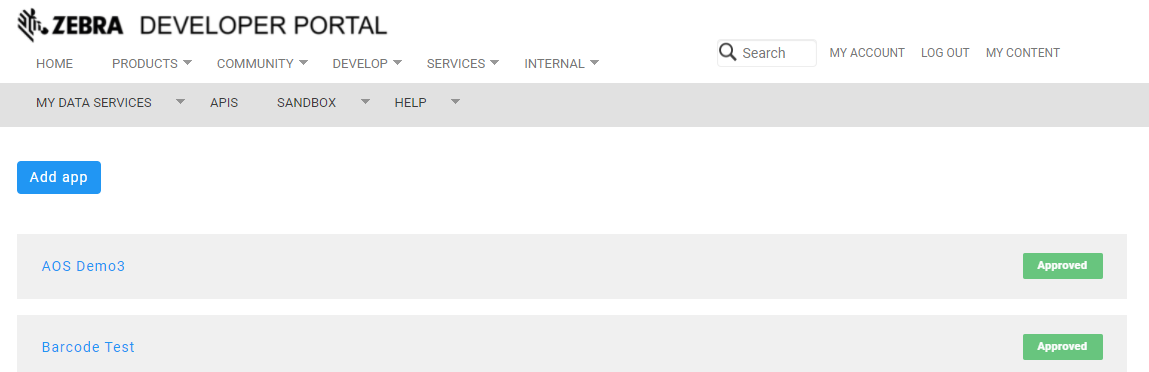
- Click the button to "Add App".
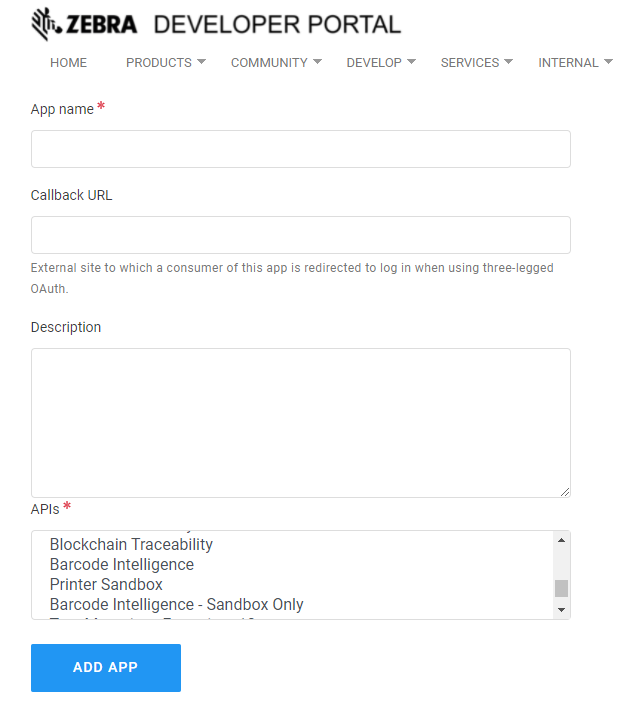
- Enter a name for the app. This is your access library, so recommended to name with your company name and use case, AKA 'ZebraPartnerTest'.
- You can leave the Callback URL box blank.
- Select the API product or products you plan to use with this app.
- Click Add App.
- In Your Apps, If you see that one of your Products is marked “Pending”, send an email to your Data Services Partner Team to let them know you have a new app that needs approval.
- Click on your app to open details and get your app key for use with the APIs. If any products are still in pending state, you will not be able to use APIs in that product until the visual indicator shows Enabled.
Test APIs
Once you have an API key, you can start using the API's. Unless shown otherwise, APIs on the Portal API page are live endpoints. You can test them in a few ways:
- Each Method has a "Try it out" button where you can enter your key and other data to send to the endpoint and get responses.
- You can take your key and use Postman or your favorite API tool to try the APIs.
- Test using the Apigee Rest Client
- There are specific directions for using the webhook subscriptions, so see the directions there for testing.
Depending on your use case and application, you may need to set up a Zebra device to work effectively with Zebra Data Services.
Connect a printer to Zebra Data Services
Connect a fixed RFID Reader to Zebra Data Services
Support
If you have questions about these directions, please ask on the Forums.