Using Time of Flight (ToF) Sensor to Capture Depth Data
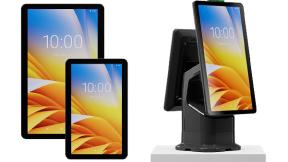
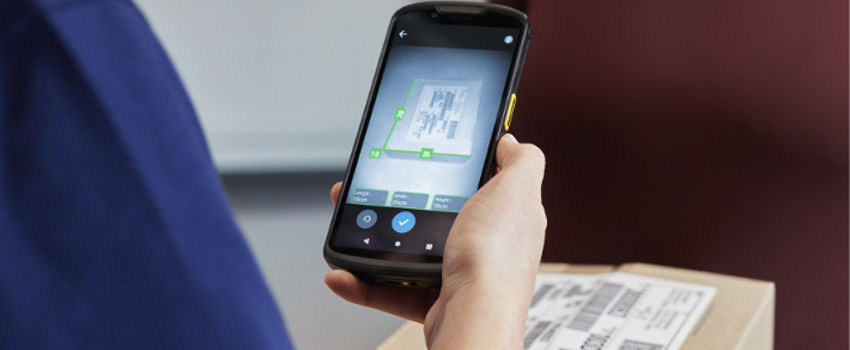
Since the announcement that premium SKUs of the Zebra TC53/TC58 and TC73/TC78 feature a Time of Flight (ToF) sensor, we have had many customers asking how to integrate the new sensor into their solutions. Interest only increased after the announcement of the Zebra Mobile Parcel solution, which uses the ToF sensor to capture certified parcel dimensions. In this post, we will discuss the different options for writing an Android application to access data from the ToF sensor, including the Camera2 API and the NDK.
ToF sensors are a relatively new technology that allow for more accurate depth sensing than traditional cameras. The sensor works by projecting modulated IR light onto a scene and sensing the reflected light with a 2D sensor array. By measuring the phase shift in the reflected light, it is possible to determine the distance for each point in the array and produce a depth map. The resulting depth map or corresponding point cloud can be used for many solutions that require sensing the 3D world around us – such as 3D scanning and measurement, motion tracking, facial recognition, adding depth-based effects to images and video, etc.
Rather than requiring a custom API, as some of our customers assumed (or feared), applications can access data from the ToF sensor using the standard Android APIs for accessing camera data. These include the Camera2 API and the NDK, but not the CameraX API. While Google recommends using the CameraX API for new development under most circumstances, the CameraX API does not support ToF sensors.
While Google provides sample code for acquiring camera frames from the CameraX API and the NDK, it can be difficult to find sample code for the Camera2 API and impossible to find sample code for dealing with depth data. The purpose of this post is to provide actual code that shows how to use the Camera2 API or the NDK to acquire depth data from the ToF sensor in the Zebra TC53/TC58 and TC73/TC78 premium devices. While the code contained in this post has been tested and is known to work, please do not expect a complete application.
The first step of the application is to determine the camera ID of the ToF sensor. You can enumerate the available cameras and search for the camera that has the REQUEST_AVAILABLE_CAPABILITIES_DEPTH_OUTPUT capability or that supports the DEPTH16 output data format. Or you can take the shortcut and just use camera ID “2”, which is the identifier for the ToF sensor on the Zebra TC53/TC58 and TC73/TC78 premium devices. The application can then configure and start the camera streams to receive the depth map data.
Before getting into the details of how to use each API, here is some common data about the ToF sensor featured in the Zebra TC53/TC58 and TC73/TC78 premium devices:
• Camera ID: 2
• Resolution: 224 x 172 pixels
• Image format: DEPTH16, DEPTH_POINT_CLOUD
Camera2 API
The Camera2 API is a low-level API that provides advanced camera control features for Android devices. It offers a more flexible way of controlling the camera on Android devices than the CameraX API and is suitable for advanced camera applications that require precise control over camera settings or that support ToF sensors. Documentation for the Camera2 API can be found at https://developer.android.com/reference/android/hardware/camera2/package-summary. For those of you who appreciate a visual representation like I do, there is a nice Camera2 overview found at https://source.android.com/docs/core/camera/camera3_requests_hal.
The Camera2 API is available in both Java and Kotlin, be we’ll be focusing on the Java API here. The advantage of providing this code in Java is that Android Studio includes a feature to automatically convert Java code to Kotlin. So, if you are writing a Kotlin application, all you need to do is copy and paste this Java code into your project and allow Android Studio to convert it for you. See https://developer.android.com/kotlin/add-kotlin.
Before starting our code, we first need to add the permission and feature to the AndroidManifest.xml.
<uses-permission android:name="android.permission.CAMERA" />
<uses-feature android:name="android.hardware.camera" />
Here is some sample code of how you can use the Camera2 API to find the ToF sensor by checking CameraCharacteristics for the camera that supports depth output:
CameraManager manager = (CameraManager) this.getSystemService(Context.CAMERA_SERVICE);
try {
    for (String cameraId : manager.getCameraIdList()) {
        CameraCharacteristics characteristics = manager.getCameraCharacteristics(cameraId);
        int[] capabilities = characteristics.get(CameraCharacteristics.REQUEST_AVAILABLE_CAPABILITIES);
        for (int capability : capabilities) {
            if (capability == CameraCharacteristics.REQUEST_AVAILABLE_CAPABILITIES_DEPTH_OUTPUT) {
                Log.d("Camera", "Found ToF sensor with ID " + cameraId);
                // cameraId now holds the camera ID of the depth camera
            }
        }
    }
    Log.e("Camera", "Unable to find ToF sensor");
} catch (CameraAccessException e) {
    e.printStackTrace();
}
Next, here is some sample code that can be used to determine the maximum resolution of the ToF sensor:
try {
    CameraCharacteristics characteristics = manager.getCameraCharacteristics(cameraId);
    StreamConfigurationMap configs = characteristics.get(CameraCharacteristics.SCALER_STREAM_CONFIGURATION_MAP);
    for (int i : configs.getOutputFormats())
    {
        if (i == ImageFormat.DEPTH16)
        {
            Size selectedSize = new Size(0, 0);
            Size[] sizes = configs.getOutputSizes(i);
            for (Size s : sizes)
            {
                if (s.getWidth() > selectedSize.getWidth() && s.getHeight() > selectedSize.getHeight())
                {
                    selectedSize = s;
                }
            }
        }
    }
} catch (Exception e) {
    e.printStackTrace();
}
Finally, here is some sample code for configuring for ToF sensor and acquiring frames in the DEPTH16 format. To do this, we create a CaptureSession and a repeating CaptureRequest based on an ImageReader that will acquire full resolution DEPTH16 frames. Please keep in mind that this is sample code and not a complete app. I have skipped the code related to permissions and not included proper error handling code. Also, there is no code for actually processing the DEPTH16 frames in the onImageAvailable callback. That part is up to you.
try {
    ImageReader imageReader = ImageReader.newInstance(selectedSize.getWidth(), selectedSize.getHeight(), ImageFormat.DEPTH16, 1);
    imageReader.setOnImageAvailableListener(new ImageReader.OnImageAvailableListener() {
        @Override
        public void onImageAvailable(ImageReader reader) {
            Image image = reader.acquireLatestImage();
            Log.d("Image", "Image Available");
            image.close();
        }
    }, null);
    manager.openCamera(cameraId, new CameraDevice.StateCallback() {
        @Override
        public void onOpened(@NonNull CameraDevice camera) {
            try {
                camera.createCaptureSession(Arrays.asList(imageReader.getSurface()), new CameraCaptureSession.StateCallback() {
                    @Override
                    public void onConfigured(@NonNull CameraCaptureSession session) {
                        try {
                            CaptureRequest.Builder captureRequest = session.getDevice().createCaptureRequest(CameraDevice.TEMPLATE_STILL_CAPTURE);
                            captureRequest.addTarget(imageReader.getSurface());
                            session.setRepeatingRequest(captureRequest.build(), null, null);
                        } catch (CameraAccessException e) {
                            e.printStackTrace();
                        }
                    }

                    @Override
                    public void onConfigureFailed(@NonNull CameraCaptureSession session) {
                    }
                }, null);
            } catch (CameraAccessException e) {
                e.printStackTrace();
            }
        }

        @Override
        public void onDisconnected(@NonNull CameraDevice camera) {
        }

        @Override
        public void onError(@NonNull CameraDevice camera, int error) {
        }
    }, null);
} catch (Exception e) {
    e.printStackTrace();
}
NDK
The NDK is a set of tools and libraries that allows developers to use native code in their Android applications. It provides a way to write performance-critical parts of an application in C or C++, which can improve the performance of the application. Since depth-processing algorithms are generally written in C or C++ for performance reasons, it might be a natural fit to do the acquisition of the depth map data in the native layer as well.
To use the ToF sensor with the NDK, you need to use the Android Native Camera API, which provides access to the cameras on Android devices using native code. The native camera API is very similar to the Camera2 API in structure, so the section above will be helpful in understanding the code here. You can find the native camera reference at https://developer.android.com/ndk/reference/group/camera.
I’m going to assume you know how to create an NDK application, as that is a bit out of scope here. Rather, I will just touch on the pieces needed for data acquisition from the ToF sensor.
Once again, the first step is to add the permission and feature to the AndroidManifest.xml, just as we did above for the Camera2 API sample code. Then, you need to add camera2ndk to the target_link_libraries in CMakeLists.txt.
target_link_libraries(camera2ndk)Here is some sample code of how you can use the native camera API to find the ToF sensor by checking ACameraMetadata for the camera that supports depth output and then determine the maximum resolution from the ACAMERA_DEPTH_AVAILABLE_DEPTH_STREAM_CONFIGURATIONS characteristic:
ACameraManager *cameraMgr = ACameraManager_create();
ACameraIdList *cameraIds = nullptr;
camera_status_t cameraStatus = ACameraManager_getCameraIdList(cameraMgr, &cameraIds);

for (int i = 0; i < cameraIds->numCameras; ++i) {
    const char *id = cameraIds->cameraIds[i];

    ACameraMetadata *metadataObj;
    cameraStatus = ACameraManager_getCameraCharacteristics(cameraMgr, id, &metadataObj);

    ACameraMetadata_const_entry entry;
    cameraStatus = ACameraMetadata_getConstEntry(metadataObj, ACAMERA_REQUEST_AVAILABLE_CAPABILITIES, &entry);

    for (uint32_t j = 0; j < entry.count; j++) {
        if (entry.data.u8[j] == ACAMERA_REQUEST_AVAILABLE_CAPABILITIES_DEPTH_OUTPUT) {
            // id now holds the camera ID of the depth camera
            int32_t width = 0;
            int32_t height = 0;
            cameraStatus = ACameraMetadata_getConstEntry(metadataObj, ACAMERA_DEPTH_AVAILABLE_DEPTH_STREAM_CONFIGURATIONS, &entry);

            for (uint32_t k = 0; k < entry.count; k += 4) {
                if (entry.data.i32[k+1] > width && entry.data.i32[k+2] > height) {
                    width = entry.data.i32[k+1];
                    height = entry.data.i32[k+2];
                }
            }

            // width and height now hold the maximum resolution
            break;
        }
    }
    ACameraMetadata_free(metadataObj);
}
ACameraManager_deleteCameraIdList(cameraIds);
Then, here is some sample code for configuring for ToF sensor and acquiring frames in the DEPTH16 format. This code is a bit more complicated that the corresponding code for the Camera2 API as we need to create all the callback / listener references. I have not defined the various callback functions other than onImageAvailable, leaving the rest for you to define (or just set nullptr in the structures). Otherwise, the code is similar to above in that we create a ACameraCaptureSession and a repeating ACaptureRequest based on an AImageReader. Once again, I have skipped the code related to permissions and not included proper error handling code.
void onImageAvailable(void *ctx, AImageReader *reader)
{
    AImage *image = nullptr;
    media_status_t mediaStatus = AImageReader_acquireLatestImage(reader, &image);
    LOGI("Image Available");
    AImage_delete(image);
}

ACameraDevice *cameraDevice = nullptr;
ACameraDevice_StateCallbacks deviceStateCallbacks = {
    .context = this,
    .onDisconnected = ::onDeviceDisconnected,
    .onError = ::onDeviceError,
};
cameraStatus = ACameraManager_openCamera(cameraMgr, id, &deviceStateCallbacks, &cameraDevice);

ACaptureSessionOutputContainer *captureSessionOutputContainer;
cameraStatus = ACaptureSessionOutputContainer_create(&captureSessionOutputContainer);

AImageReader *imageReader;
media_status_t mediaStatus = AImageReader_new(width, height, AIMAGE_FORMAT_DEPTH16, 2, &imageReader);

AImageReader_ImageListener listener {
    .context = this,
    .onImageAvailable = ::onImageAvailable
};
mediaStatus = AImageReader_setImageListener(imageReader, &listener);

ANativeWindow *nativeWindow;
mediaStatus = AImageReader_getWindow(imageReader, &nativeWindow);

ACaptureSessionOutput *captureSessionOutput;
cameraStatus = ACaptureSessionOutput_create(nativeWindow, &captureSessionOutput);

cameraStatus = ACaptureSessionOutputContainer_add(captureSessionOutputContainer, captureSessionOutput);

ACameraOutputTarget *cameraOutputTarget;
cameraStatus = ACameraOutputTarget_create(nativeWindow, &cameraOutputTarget);

ACaptureRequest *captureRequest = nullptr;
cameraStatus = ACameraDevice_createCaptureRequest(cameraDevice, TEMPLATE_PREVIEW, &captureRequest);

cameraStatus = ACaptureRequest_addTarget(captureRequest, cameraOutputTarget);
ACameraCaptureSession *cameraCaptureSession;

ACameraCaptureSession_stateCallbacks sessionStateCallbacks = {
        .context = this,
        .onClosed = ::onSessionClosed,
        .onReady = ::onSessionReady,
        .onActive = ::onSessionActive,
};
cameraStatus = ACameraDevice_createCaptureSession(cameraDevice, captureSessionOutputContainer, &sessionStateCallbacks, &cameraCaptureSession);

ACameraCaptureSession_captureCallbacks sessionCaptureCallbacks {
    .context = this,
    .onCaptureStarted = nullptr,
    .onCaptureProgressed = nullptr,
    .onCaptureCompleted = nullptr,
    .onCaptureFailed = ::onSessionCaptureFailed,
    .onCaptureSequenceCompleted = ::onSessionCaptureSequenceCompleted,
    .onCaptureSequenceAborted = ::onSessionCaptureSequenceAborted,
    .onCaptureBufferLost = nullptr,
};
cameraStatus = ACameraCaptureSession_setRepeatingRequest(cameraCaptureSession, &sessionCaptureCallbacks, 1, &captureRequest, nullptr);
Conclusion
While the above code may seem a bit complicated or intimidating, you can see that the ToF sensor can be accessed using the exact same APIs as you would use to work with a standard color camera. Hopefully, you can use the above code as a starting point for developing your own amazing solutions using the ToF sensor featured in the Zebra TC53/TC58 and TC73/TC78 premium devices. As an example of what can be accomplished, please look at the Zebra Mobile Parcel solution (https://techdocs.zebra.com/mobile-parcel/1-0/guide/about/) that was developed entirely using this ToF sensor. We look forward to seeing what our amazing partners and customers are able to accomplish with this new technology!

Ted Trask