ET1 Staging with ADB-Master
ET1 Staging with ADB-Master
Introduction
ADB-Master is a third-party PC-based GUI for Android Debug Bridge (ADB) which has some key features that make it easier to configure and deploy Android devices such as the ET1. The ET1 is currently unsupported by the EMDK for Android and StageNow so the methods described here can be used to automate the staging of one or more ET1’s using ADB either via the USB connection (max 8 devices per PC) or via WiFi (which should allow a larger number of concurrently connected devices).
Advantages:
- Device settings can be configured automatically using ADB shell command scripts
- Applications can be installed automatically via drag&drop or multiple file selection
- One or more devices can be configured by multiple selection of the connected devices
- Devices can be easily switched from USB to WiFi connection and vice versa
- Can be used to auto-configure some settings which are currently unsupported via StageNow/EMDK methods e.g. WiFi hotspot, VPN etc.
Disadvantages:
- Settings and apps installed this way are not Enterprise Reset persistent
- ADB Shell command scripts can vary from device to device and from Android OS version to version e.g. you will generally need one command script for JellyBean and a different script for KitKat.
- Does require some manual steps to start the process i.e this is not a zero-touch configuration method.
- ADB-Master is a third party tool and therefore unsupported by Zebra Technologies i.e. use at your own risk
ADB-Master is available in an unlicenced version at http://forum.xda-developers.com/showthread.php?t=2707556 and in a licenced version at Google Play Store
This posting refers to functionality introduced in ADB-Master 1.60
Key Features
1. Application Installation - In Applications tab, APK files can be installed via the Install button i.e. press button and select one or more APK files to install to whichever devices are selected in the upper panel. Also supports drag and drop of one or more APK files to the Application panel in which case there is no prompting i.e. APK files are installed immediately.
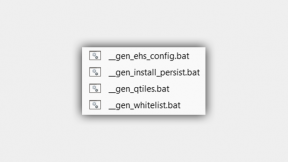
2. Settings Configuration - In the Console tab , one or more script files can be selected via the Browse button i.e. press button and select one or more BAT files to execute on whichever devices are selected in the upper panel. BAT files contain ADB shell commands to remotely drive the UI e.g. for configuring the ET1 display resolution to 240 dpi , the following commands are used:
adb shell am start -a android.intent.action.MAIN -n com.android.settings/.DisplaySettings
adb shell input tap 280 380
adb shell input tap 480 350
adb shell input tap 680 380
A guide on creating these Shell commands is posted at https://developer.motorolasolutions.com/community/android/android-forums/android-blogs/blog/2015/03/09/introduction-to-adb-shell-commands
Note that BAT files can also be dragged and dropped to the Console panel in the same way as with APK files in the Application panel (in which case no confirmation prompts are displayed before deploying these command scripts)
3. WiFi Connectivity - For connecting devices via WiFi, there is a drop down list highlighted above which will allow the user to select which network adaptor to use to search for the WiFi devices i.e. first highlight one or more devices in the USB panel and then press ‘Switch selected to network’. Check that the dropdown box has the appropriate network adaptor selected and the WiFi connected devices should then appear in the Network panel. All previously described commands/operations can also be directed to WiFi connected units.
Typical Usage
From out-of-box condition (i.e. as shipped from the factory) the following steps would typically be required to configure devices for use by a customer:
- a) Insert battery , power up device , enable ADB via Settings and connect to PC via USB cable
- b) In ADB-Master , device(s) should show up in top left panel. Optionally switch to WiFi connection if the devices have been pre-configured to connect to a WiFi network
- c) Select one or more devices in top left panel and from Console tab, either drag&drop or select one or more BAT files to configure Settings
- d) Select one or more devices in top left panel and from Applications tab, either drag&drop or select one or more APK files to install apps.
- e) Devices are now ready for field deployment.
Sample ET1 script files for local language selection and DPI resolution change are attached for reference.
Ian Hatton
Zebra EMEA April 15

Anonymous (not verified)


