New PC SendTo Shortcuts for Enhanced Productivity When Configuring Zebra EMC Devices
New SendTo Shortcuts for Zebra Devices v1
Overview
This document describes a revised collection of shortcut files located in a PC (Windows 10 or later) SendTo folder in order to allow quick ‘right click’ access to commonly used utils and file transfers. This version replaces the shortcuts described in several previous blog posts and streamlines the number of shortcuts required since each one has a sub-menu with multiple options.
Note that they are provided ‘as is’ i.e. no support & use at your own risk.
The functionality supported includes multiple APK installation, certificate + package name extraction from APK file , processing raw XML , installing new Datawedge profile , auto-generating an Enterprise Home Screen configuration and updating Enterprise Browser configurations.
System Requirements
Shortcuts are compatible with PC’s running Win 10 onwards and they require both ADB and Java to be included in the PC system path. Open a command prompt to verify that both adb and java are recognised commands – if not, they need to be added to the system path by editing the PATH environment variable.
Installation
Note: If any of the previous shortcuts detailed in prior blogs were installed then it is recommended to manually delete these from the SendTo folder before installing the new versions. The older shortcuts can co-exist with the new ones but it will create a longer SendTo menu than is necessary.
- Download zip file from: https://drive.google.com/file/d/1-91XN7Hsc78lLmCbTZFmhXAH-7NER63l/view?…
- Extract all files to SendTo folder (access by Win+R, type shell:sendto and press enter) , preserving the sub-folder structure
- Open a command prompt in the SendTo folder and type ADB to check that it is available in that path – if not , check the PC PATH environment variable to ensure that it includes the path to the ADB.EXE on your PC. Repeat the check for Java by typing java in the same window.
- Note that due to the complexity of the batch file syntax used to create these shortcuts, the path to any files which are right clicked should not contain any spaces . If in doubt, copy the file to C:/temp or a similar folder with a short path before right clicking the file.
- On Windows 11 , the SendTo folder is hidden by default and has to be expanded after right clicking via ‘Show More Options’ . In order to avoid this additional step , follow the guide here: https://www.howtogeek.com/759449/how-to-get-full-context-menus-in-windows-11s-file-explorer/
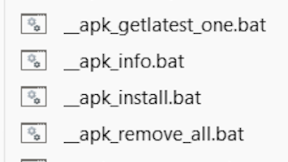
- Select any file and right click to check that the new options are present as shown below.
Usage
__apk_actions1.bat

- Install the selected APK (one or more)
- Install and run the selected APK (one only)
- Remove the selected APK (one only)
- Get the latest version of the selected APK via APKCombo.com
- Run the selected APK (assumes it is already installed)
- Extract the certificate file for the selected APK - this will generate a separate CRT file which can be imported in StageNow
- Generate a XML template file containing AccessMgr with the package name and certificate of the selected APK . The default template name is accessmgr_grant.xml and the default permissions included in the XML is android.permission.SYSTEM_ALERT_WINDOW (draw over other apps) but this can be edited to request any of the supported permissions.
- Backup all the APK’s on the device – in this case the selected filename is not used and the device connected via ADB will be queried for it’s current user-installed apps. The app paths are stored together with the adb pull command in a file named backupall.bat which is then called in order to retrieve the APK’s from the connected device. Note that this will not work with XAPK or APKS formats as the APK retrieved is only the base version and not each component.
__apk_actions2.bat

- Query the connected device to return the model , serial number , OS version, processor platform etc e.g.
- Return info extracted from the selected APK manifest including package name , target API and permissions requested e.g
- Attempt to extract the APK managed config structure if it exists – this will check the APK for a Managed Config extract a summary of the config i.e. the base string names and number of strings e.g. for Enterprise Browser 5.x
- Install the selected APK using the –bypass-low-target-sdk-block flag (allows API lower than 23 on A14) . Use this when installing an older APK on Android 14 or above
- Install the selected XAPK file – this will first unzip the individual APK’s contained in the XAPK and then install them using the ADB install-multiple option . The extracted APK’s will be stored in a sub-folder named ‘install’ which also contains an install.bat file – running this file will install all the component APK’s again if required e.g. if the app has been removed from the device. If it is required to uninstall the app via the APK Actions1 menu (option 3, uninstall selected APK) then it is necessary to highlight and right click the base APK for the XAPK package – this will normally be the APK with the package name.
EM45
13-36-20.00-TG-U00-STD-ATH-04
242575247D0024
QCM5430
package: name='com.carriez.flutter_hbb' versionCode='2056' versionName='1.3.7' platformBuildVersionName='14' platformBuildVersionCode='34' compileSdkVersion='34' compileSdkVersionCodename='14'
sdkVersion:'21'
targetSdkVersion:'33'
uses-permission: name='android.permission.MANAGE_EXTERNAL_STORAGE'
uses-permission: name='android.permission.POST_NOTIFICATIONS'
uses-permission: name='android.permission.REQUEST_IGNORE_BATTERY_OPTIMIZATIONS'
uses-permission: name='android.permission.READ_EXTERNAL_STORAGE'
uses-permission: name='android.permission.WRITE_EXTERNAL_STORAGE'
uses-permission: name='android.permission.INTERNET'
uses-permission: name='android.permission.ACCESS_NETWORK_STATE'
uses-permission: name='android.permission.FOREGROUND_SERVICE'
uses-permission: name='android.permission.RECORD_AUDIO'
uses-permission: name='android.permission.WAKE_LOCK'
uses-permission: name='android.permission.RECEIVE_BOOT_COMPLETED'
uses-permission: name='android.permission.SYSTEM_ALERT_WINDOW'
uses-permission: name='com.carriez.flutter_hbb.DYNAMIC_RECEIVER_NOT_EXPORTED_PERMISSION'
uses-permission: name='android.permission.CAMERA'
String pool of 60 unique UTF-8 non-sorted strings, 60 entries and 0 styles using 1384 bytes:
String #0 : description
String #1 : key
String #2 : restrictionType
String #3 : title
String #4 : defaultValue
String #5 : entries
String #6 : entryValues
String #7 :
String #8 : android
String #9 : http://schemas.android.com/apk/res/android
String #10 : restrictions
String #11 : restriction
String #12 : navigationConfig
String #13 : StartPage
String #14 : file://%INSTALLDIR%/menu.html
String #15 : BadLinkUrl
String #16 : file://%INSTALLDIR%/badlink.html
String #17 : NavigationTimeout
String #18 : webUrlFilteringConfig
String #19 : WebsiteFiltering
String #20 : UrlWhitelist
String #21 : UrlBlacklist
String #22 : HttpProxy
String #23 : HttpsProxy
String #24 : kioskConfig
String #25 : FullScreen
String #26 : StatusBar
String #27 : NavigationBar
String #28 : HomeButtonAction
String #29 : BackButtonAction
String #30 : RecentButtonAction
String #31 : VolumeButtonAction
String #32 : ExitPassword
String #33 : ExitPasswordValue
String #34 : barcodeScanningConfig
String #35 : scanApiToggle
String #36 : EMDKBarcodeConfiguration
String #37 : scannerOnNav
String #38 : DecodeSuccessSound
String #39 : UseEBGeneratedAudio
String #40 : DecodeVolume
String #41 : DecodeFrequency
String #42 : DecodeDuration
String #43 : appUiConfig
String #44 : autoRotateConfig
String #45 : LockOrientation
String #46 : splashScreenConfig
String #47 : SplashScreenImage
String #48 : file://%INSTALLDIR%/rho/apps/app/loading.png
String #49 : SplashScreenDuration
String #50 : broadcastReceiverConfig
String #51 : IntentReceiver
String #52 : IntentActionArray
String #53 : IntentActionBundle
String #54 : IntentAction
String #55 : IntentCategoryArray
String #56 : IntentCategoryBundle
String #57 : IntentCategory
String #58 : domCustomConfiguration
String #59 : EBLibraryInjection
__copy_enterprise.bat
-
Copy file(s) to /enterprise/usr
-
Copy file(s) to /enterprise/device/enterprisebrowser
-
Copy file(s) to Datawedge autoimport folder
-
Copy file(s) to Enterprise Keyboard custom config folder
__copy_mx.bat
-
This is required for non-SD660 devices which have a block on accessing the /enterprise folder and sub-folders via ADB
-
This method uses a Mx FileMgr-based utility to copy the files to the /enterprise path. The utility is automatically installed if it is not already present on the connected device.
- Copy file(s) via Mx FileMgr to /enterprise/usr
- Copy file(s) via Mx FileMgr to /enterprise/device/enterprisebrowser
- Copy file(s) via Mx FileMgr to Datawedge auto-import folder
- Copy file(s) via Mx FileMgr to Enterprise keyboard custom layout folder
__copy_sdcard.bat
- Copy file(s) to /sdcard
- Copy+rename a single selected file to /sdcard/myxml.xml – this allows it to be processed via reading one of the StageNow barcodes below (which contain a single Batch CSP step to process /sdcard/myxml.xml) :


3. Copy file(s) to /sdcard/Download
4. Copy+rename the single selected file to /sdcard/Download/FullPackageUpdate.zip. This allows an appropriate OS update ZIP file to be installed on the connected device by reading one of the following StageNow barcodes (which contain a single PowerMgr step to start the OS update using the file /sdcard/Download/FullPackageUpdate.zip)


5. Copy selected file(s) to /sdcard/Download/currentfolder (folder should be exist on device beforehand)
6. Copy selected folder and contents to /sdcard/Download/foldername – will create folder if it does not already exist
__gen_xml.bat
These shortcuts generate XML to perform various functions . In the case of the first 2 options (which generate Mx XML) the XML can either be processed using the Mx Batch CSP or can be deployed via an EMM using OEMConfig/XML Pass-through.
- Generate XML to install the selected APK(s) from a remote server. The path to the remote server root folder must be pre-defined in the environment variable RXML and the files must be transferred to a folder on the server with the same name as the current folder
Example:
A single DeviceCentral APK file is located in a sub-folder named device_central on the development PC
- Right click on the APK file and select gen_xml option 1
- The root path defined in the RXML environment variable is used to build the path to the file on the remote server i.e. RXML/sub-folder/filename.APK . The resulting XML would look similar to the example below. In this case the path defined in RXML would be http://myserver.com/rxml
<wap-provisioningdoc>
<characteristic version="0.6" type="FileMgr">
<parm name="FileAction" value="1"/>
<characteristic type="file-details">
<parm name="TargetAccessMethod" value="2"/>
<parm name="TargetPathAndFileName" value="/sdcard/DeviceCentral_4.2.apk"/>
<parm name="SourceAccessMethod" value="1"/>
<parm name="SourceURI" value="http://myserver.com/rxml/device_central/DeviceCentral_4.2.apk"/>
</characteristic>
</characteristic>
<characteristic version="11.3" type="AppMgr">
<parm name="Action" value="Upgrade"/>
<parm name="APK" value="/sdcard/DeviceCentral_4.2.apk"/>
</characteristic>
</wap-provisioningdoc>
- Use a file transfer tool to transfer the generated device_central.xml file to the same sub-folder on the remote server i.e. in the path http://myserver.com/rxml/device_central in this case
- Also transfer the APK file(s)
- In StageNow, access the All Profiles screen, select Import Profile(s) and then browse to select the generate _import_to_stagenow.xml file . This file contains a simple StageNow bootstrap profile consisting of two steps:
- FileMgr step to transfer the remote XML file to the device
- Batch step to process the XML on the device
- Rename the bootstrap profile and generate the required XML and/or JS barcodes
- Configure a device with an internet connection (if not using an intranet) , start StageNow on the device and read the barcodes to test the profile.
- Generate XML to add the selected APK(s) to a whitelist i.e. any user-installed apps not specified on the whitelist will be blocked for installation or execution. The generated XML is named whitelist.xml and contains the list of packagenames extracted from the APK’s which were selected. An example whitelist.xml generated this way is as follows:
<wap-provisioningdoc>
<characteristic version="4.3" type="AccessMgr">
<parm name="OperationMode" value="2"/>
<parm name="SystemSettings" value="1"/>
<parm name="DeletePackagesAction" value="0"/>
<parm name="AddPackagesAction" value="1"/>
<parm name="AddPackageNames" value=" com.zebra.ih.chrome_textinput , com.zebra.jamesswinton.profileswitcher , "/>
</characteristic>
<characteristic version="4.3" type="PowerKeyMgr">
<parm name="SafeMode" value="2"/>
</characteristic>
</wap-provisioningdoc>
In the above example , the two packages are added to the whitelist and anything else will be blocked for user installation or execution. This does not affect use of any pre-installed apps which are whitelisted by default.
- Generate XML to add the selected APK(s) to a default template enterprisehomescreen.xml file . When deployed to /enterprise/usr, this file will define which apps are available on the EHS launcher . An extract from an example enterprisehomescreen.xml generated this way is as follows:
<applications>
<application label="ProfileSwitcherGeneric" package="com.zebra.jamesswinton.profileswitcher" activity=""/>
<application label="chrome_textinput" package="com.zebra.ih.chrome_textinput" activity=""/>
</applications>
Note that the application label is the name used for the app when it is shown on the EHS launcher – if this name requires editing it can be changed via a standard text editor before copying the file to the test device e.g. via the following ADB command:
Adb push enterprisehomescreen.xml /enterprise/usr

Ian Hatton