Enterprise Browser - Modernizing web applications
Note: This blog describes the content presented during Zebra Technologies’ DEVTALK recorded March 21st, 2018 about Enterprise Browser. You can find a recording of the presentation on Zebra’s Developer Portal.
Note2: Thanks to all the Enterprise Browser team and to Dan Quagliana for the time they spent explaining to me this product and the time they spent reviewing and editing this content.
Modernize Web Applications
Enterprise Browser is not just a browser, it’s a business enabler that Symbol, Motorola, Motorola Solutions and now Zebra has developed over the last 15 years.
I know that fancy tag line remembers those cats’ posters: but it’s true!
What is Enterprise Browser?
Stealing from the official website, Enterprise Browser (EB from now on) allows to use standard web technologies (HTML5, CSS and JavaScript) to build application that can fully exploit the hardware features of Zebra Technologies’ devices, across multiple operative systems:
- Android
- Windows CE
- Windows Mobile
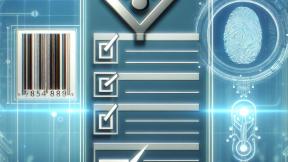
How can you exploit HW capabilities like Barcode scanners?
Enterprise Browser makes available a set of proprietary APIs that allows direct control of barcode scanner, RFID, connected printers, camera, etc.
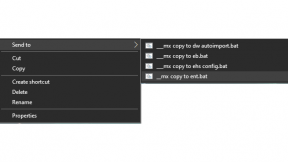
But this is only half of the story for Enterprise Browser, another good set of functionalities derives from its configuration capabilities through its config.xml.
This is the file where you select the URL that is going to be used by the browser, but this is just the start. You can lock down a device, so that EB is running in Kiosk mode (both on legacy windows and Android); You can inject new functionality to an existing Web Application, without the need to modify anything on the server side (it’s not magic, it’s what we call DOM Injection) or simply a fully customizable on-screen keyboard when using EB on an Android full-touch device.
How did we end-up here?
If we look at this product history we can see that it’s not only about companies with different names. The product itself has been through multiple phases:
- Symbol PocketBrowser
- Motorola PocketBrowser
- Motorola Project Neon / RhoElements v1.x
- Motorola RhoElements v2.x Shared Runtime
- Motorola RhoElements v4.x Common API
- Zebra Enterprise Browser
Looking back at this product history should not surprise you that, over the last 15 years, we spent time adding features to support customers request. The end result of this activity is that the same goal can be achieved using different API or configuration settings.
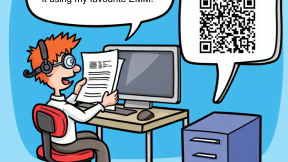
EMML 1.x - Enterprise Mashup Markup Language
EMML is the Enterprise MetaTags Markup Language used initially by Pocket Browser to add capabilities to web application and it evolved from the initial syntax in PB v1.x and 2.x to what is now used in EB (EMML1.1).
PB v2.x syntax to scan a barcode:
http-equiv="scanner" content="AIM_TYPE_PRESENTATION">
http-equiv="scannernavigate" content="Javascript:doScan('%s');">
http-equiv="scanner" content="enabled">
onLoad="doSoftScan();">
="JavaScript">
var Generic = new ActiveXObject("SymbolBrowser.Generic");
function doSoftScan()
{
Generic.InvokeMetaFunction('scanner', 'start');
}
function doScan(data)
{
bcode.innerHTML = data;
doSoftScan();
}
id="bcode">
If we look at the same functionality in RhoElements v2.x Shared runtime, the syntax to scan a barcode using MetaTags and the Scanner API is not so different:
http-equiv="scanner" content="aimType:presentation">
http-equiv="scanner" content="DecodeEvent:url('Javascript:doScan('%s');')">
http-equiv="scanner" content="enable">
onLoad="doSoftScan();">
="JavaScript">
function doSoftScan() {
scanner.start();
}
function doScan(jsonObject) {
bcode.innerHTML = jsonObject.data;
doSoftScan();
}
id="bcode">
RhoElements v4.x and the Common API in JavaScript (and Ruby)
RhoElements v4.0 introduced the concept of a CommonAPI, one true API to overcome all the differences between the original EMML syntax, RhoElements v1.x Syntax and the RhoMobile framework syntax:
Three Rings for the Elven-kings under the sky,
Seven for the Dwarf-lords in their halls of stone,
Nine for Mortal Men doomed to die,
One for the Dark Lord on his dark throne
In the Land of Mordor where the Shadows lie.
One Ring to rule them all, One Ring to find them,
One Ring to bring them all and in the darkness bind them
In the Land of Mordor where the Shadows lie. (J.R.R. Tolkien)
The CommonAPI architecture is much more JavaScript and DOM friendly, adding only a single object:
- Rho - in the original RhoMobile v4.x syntax
- EB - in the current Enterprise Browser syntax
So, nowadays, all the new CommonAPIs are available under the EB object.
To scan a barcode, the syntax now becomes:
Barcode API Test ="text/javascript" charset="utf-8" src="ebapi-modules.js">
="text/javascript">
function scanReceived(params){
// No data or no timestamp, scan failed.
if(params['data']== "" || params['time']==""){
document.getElementById('display').innerHTML = "Failed!";
return;
}
// Data and timestamp exist, barcode successful, show results
var displayStr = "Barcode Data: " + params['data']+"
Time: "+params['time'];document.getElementById("display").innerHTML = displayStr;
}
function enableScanners(){
EB.Barcode.enable({}, scanReceived);
// Empty property hash, '{}' loads default values for the scanner.
}
function unloadEvent(){
EB.Barcode.disable();
// Disable Barcode on unload of page to free it up for other operations.
}
onunload='unloadEvent()'>
Barcode API Test
id="display">Barcode Data:
Time:
What does this mean? There may be multiple ways to achieve the same result in EB!
Example 1: Scale Webpage to a different size
One common request when users/partners needs to use and existing web application to a new device is to adapt the dimension to the available screen-size.
A very easy way to customize this in Enterprise Browser is to configure the Zoom parameters in Config.xml:
value="1"/>
value="1.0" />
value="1"/>
Looking at the documentation for PageZoom:
PageZoom
Sets the zoom factor of the page.
Default zoom value is 1.0 (if unspecified). On Android, zero and negative values are not supported. On Windows, zoom value less than 1.0 reverts to 1.0 since lower values would not be readable. Page zoom settings will sometimes be reflected a few milliseconds after navigating from one page to another. A one-second delay should be anticipated. Not Supported when using Internet Explorer as the rendering engine.
Wait, what do you mean that «On Windows, zoom value less than 1.0 reverts to 1.0»?
Well, it means that if you’re trying to use a web application built for a larger desktop screen, you cannot scale it down with this configuration!
Are we out of luck?
of course not! we can dig up the Zoom metatag that allows to scale up and down a webpage. To have this applied to all the pages, we can use the DefaultMetaTags portion in the Config.xml:
VALUE=“zoom~page:0.5;text:1” />
So, you can not only zoom out the page, but you can keep the text at the default zoom.
Customize screen size
This is a common topic, that we just saw has a very simple answer using the PageZoom option in EB’s Config.xml and, because usually you want to Zoom in on an existing Web Application, that’s cover most of the cases.
We saw another option with the Zoom Tag that usually needs to be included in every page of the web application but, we can cover this with the DefaultMetaTags option in EB’s Config.xml.
But wait, there’s more!
Enterprise Browser v1.3 introduced support for DOM Injection that allows to add elements to the DOM. We can use this functionality to «inject» on every page the Zoom tag (or do more fancy stuffs that we’re describing later).
Where this DOM Injection functionality can be very helpful is that it allows us to specify a subset of pages where we want to inject the tag. Think about wanting to zoom in only on the login page.
In this case we need to add a reference to our «tags file» that describe the elements that we want to add to the pages. This needs to reside on the device and is going to be referenced in EB’s Config.xml by the CustomDomElements tag:
value="file://%INSTALLDIR%\di_tags.txt"/>
We can then specify that we want to have the Zoom tag injected on all the pages:
HTTP-Equiv="zoom" Content="page:0.5" pages='*'/>
or just on a subset (in theory):
HTTP-Equiv="zoom" Content="page:1.0" pages='*'/>
HTTP-Equiv="zoom" Content="page:0.5" pages='/login.html'/>
But here’s where we can start to see the limits of this technology: the tag is injected after that the DOM is rendered and this generate some strange behaviour (you see that the zoom is taking effect only you navigate to the next page).
First thing first… what’s DOM Injection?
From EB’s documentation
Overview
Apps made with Enterprise Browser 1.3 and higher are able to perform DOM Injection, the ability insert CSS, JavaScript and/or meta tags into the DOM without modifying the underlying application. This permits features, capabilities and even the look of one or more server-based Enterprise Browser app pages to be modified at runtime using DOM elements stored in a text file on the device.
A better sample of DOM Injection
A better sample for DOM Injection could be the necessity to select a screen orientation for an existing Web Application. This can be useful when you want to use a device in a particular orientation (landscape, as an example, for a wearable device) and you discover that the available options in Config.xml only allows you to disable the rotation. So, whatever is the selected orientation when you launch EB, it became the orientation that you’re going to use:
value="0" />
A better solution can be enabled using DOM Injection and some easy JavaScript.
First of all, we can inject EB’s JavaScript libraries in our Config.xml this allows us to have the libraries available:
value="1"/>
Now we can inject a JavaScript file in our application as we have seen before, but this time the tag file needs to reference a script:
="text/javascript" src="/landscape.js" pages="*" />
And the landscape.js file itself:
EB.ScreenOrientation.rightHanded();
console.log('Landscape Configured');
This guarantee that the web application is always using the correct screen orientation.
Note: It may seems silly to include a console.log in such a simple JavaScript code, but it is useful for two reasons:
- It allows to see on the DevChrome Tools’ console that the code has been injected
- It provides an easy way to retrieve the code (Chrome devTools put a link to the console statement close to the logged text)
A final sample: adding barcode scanning capabilities to an application
As a final sample for DOM Injection I’m going to present one of the main usecase for DOM Injection: adding barcode scanning capabilities to an existing application.
We’re going to focus on Android as the target operative system, and we know that, on this operative system, Zebra Technologies’ devices can use DataWedge to scan barcodes. But with EB’s DOM Injection we can achieve a much better integration!
Again, we start with some plumbing in config.xml enabling EB’s JavaScript libraries injection to have the libraries available:
value="1"/>
Next, we need to add a reference to the tag file:
value="file://%INSTALLDIR%\di_tags.txt"/>
Now we can inject a JavaScript file in our application as we have seen before, but this time the tag file needs to reference a script:
="text/javascript" src="/scanning.js" pages="*" />
And the scanning.js file itself:
function scanReceived(params){
var barcodeStr = params['data'];
//put the barcode into the field in focus
document.activeElement.value = barcodeStr;
//now we are going to place the data into the input field with id barcode1
document.getElementById("barcode1").value = barcodeStr;
}
function enableScanners(){
EB.Barcode.enable({}, scanReceived);
// Empty property hash, '{}' loads default values for the scanner.
}
function unloadEvent(){
EB.Barcode.disable();
// Disable Barcode on unload of page to free it up for other operations.
}
enableScanners();
console.log("file injected");
This code is going to enable the barcode scanner with the default properties, then inserting the barcode data into the current element (the focused element).
As an alternative example, if you need to read Interleaved 2of5 barcodes, you can enable the barcode API with this parameters:
EB.Barcode.enable({i2of5:true, i2of5maxLength:30, i2of5minLength:4}, scanReceived);
For a full list of the available properties take a look at EB’s Barcode API documentation.
Adding a custom on-screen keyboard to an existing application
The official name for custom keyboards in Enterprise Browser is ButtonBar. Let’s take a look at what the documentation says about them:
Overview
Enterprise Browser 1.7 (and higher) for Android includes ButtonBar APIs, which can deliver custom features and functions through on-screen buttons or keys. Functions can include simple actions such as launching an app or activity, sending an intent or virtually any action that can be executed using JavaScript.
How it Works
The settings, parameters, actions and attributes of the desired on-screen button(s) are stored in an XML container called Button.xml. If any of those buttons are to execute JavaScript, the JavaScript code is contained in a second file called CustomScript.xml. Both files are stored on the device in the same folder of the Config.xml file.
ButtonBars can be shown and hidden programmatically as required by an app’s pages through methods implemented in one of 50 ButtonBar APIs currently supported.
Let’s see an example
Starting from the Button.xml this can be a quite complex file, where we’ve all the description of the keyboard layout. It’s still a manual process at this moment, but we are planning to have a tool to help in the process. Still just a plan!
value="Horizontal"/>
value="#003370" />
value="#003370" />
value="0" />
value="20" />
value="0" />
value="0" />
value="596" />
value="144" />
value="144" />
value ="runscript-togglescript1"/>
value ="/storage/emulated/0/Android/data/com.symbol.enterprisebrowser/keyboard_up.png"/>
value="Horizontal"/>
value="#0033cc" />
value="#0040ff" />
value="70" />
value="20" />
value="2" />
value="560" />
value="200" />
value="640" />
value="100" />
value ="7"/>
value ="key-14"/>
value ="8"/>
value ="key-15"/>
value ="9"/>
value ="key-16"/>
value="Horizontal"/>
value="#0033cc" />
value="#0040ff" />
value="70" />
value="20" />
value="2" />
value="560" />
value="302" />
value="640" />
value="100" />
value ="4"/>
value ="key-11"/>
value ="5"/>
value ="key-12"/>
value ="6"/>
value ="key-13"/>
value="Horizontal"/>
value="#0033cc" />
value="#0040ff" />
value="70" />
value="20" />
value="2" />
value="560" />
value="404" />
value="640" />
value="100" />
value ="1"/>
value ="key-8"/>
value ="2"/>
value ="key-9"/>
value ="3"/>
value ="key-10"/>
value="Horizontal"/>
value="#0033cc" />
value="#0040ff" />
value="70" />
value="20" />
value="0" />
value="560" />
value="506" />
value="212" />
value="100" />
value ="0"/>
value ="key-7"/>
value="Horizontal"/>
value="#0033cc" />
value="#0040ff" />
value="70" />
value="60" />
value="0" />
value="774" />
value="506" />
value="212" />
value="208" />
value="↵"/>
value ="key-160"/>
value="Horizontal"/>
value="#0033cc" />
value="#0040ff" />
value="70" />
value="30" />
value="0" />
value="988" />
value="506" />
value="212" />
value="100" />
value="⬅︎"/>
value ="key-67"/>
value="Horizontal"/>
value="#0033cc" />
value="#0040ff" />
value="70" />
value="20" />
value="0" />
value="560" />
value="608" />
value="212" />
value="108" />
value ="F3"/>
value ="key-133"/>
value="Horizontal"/>
value="#0033cc" />
value="#0040ff" />
value="70" />
value="20" />
value="0" />
value="988" />
value="608" />
value="212" />
value="108" />
value ="F4"/>
value ="key-134"/>
value="Horizontal"/>
value="#003370" />
value="#003370" />
value="0" />
value="20" />
value="0" />
value="0" />
value="596" />
value="144" />
value="144" />
value ="runscript-togglescript2"/>
value ="/storage/emulated/0/Android/data/com.symbol.enterprisebrowser/keyboard_down.png"/>
This is a sample that I’ve implemented for Enterprise Browser v1.7. The current version 1.8 introduces some new features that allows to use relative Coordinates for ButtonBar positioning
value="0.25*devicewidth"/>
value="0.25*deviceheight"/>
value="0.5*devicewidth"/>
value="deviceheight-100"/>
value="devicewidth/2"/>
This allows to build button bars that can be used on multiple devices (maintaining a similar screen geometry), without having to create and maintain a different keyboard for every device.
Debugging Techniques - aka: Real Life Survival Guide
Config.xml
One of the major cause of issues with Enterprise Browser is using an old Config.xml (from a previous EB’s version); so, my main troubleshooting technique is to always start with a fresh Config.xml using this steps:
- Install a new version of EB on a clean device (EB creates a new Config.xml only if there’s none in /sdcard/Android/data/com.symbol.enterprisebrowser)
- Launch EB
- Close EB
- Copy the newly created configuration from /sdcard/Android/data/com.symbol.enterprisebrowser/Config.xml
EB v1.8 now includes some information about the version that created the file and this information is displayed in EB’s Log:
value="1.8.0.0"/> : : : : : : : :
Logging and WebPage Capture
Customer applications are mostly on premises solution with no access from outside networks. EB introduced ways to enable collecting logs and debug and web page captures.
EB’s includes some powerful logging capabilities that can be enabled and configured inside EB’s Config.xml, take a look at the documentation for a full list of the options:
value="FILE"/>
value="80"/>
value="file://%INSTALLDIR%/Log.txt"/>
value="1"/>
value="1"/>
value="1"/>
value="0"/>
value="0"/>
value="0"/>
value="5000"/>
value="1000"/>
Another powerful option for debugging remote application is to enable WebPage Capture. In this case EB’s is going to save a copy of the visited web pages and a screenshot on the divide for later analysis:
value="1"/>
With this option enabled you can find screenshots and web pages source under the Diagnostic folder:
On Device debugging
Using Chrome Dev Tools, it is possible to debug application running on mobile device. For Android, the only requirement is to run Android v4.4.x or newer and to enable the debug capabilities in EB’s Config.xml:
value="1"/>
You can find more information on this feature and how to use it for legacy windows devices on EB’s documentation
Chrome Dev Tools
Chrome DevTools allows to debug remote devices connected through the ADB protocol.
Once you’ve you're device connected to your computer with a working ADB connection, you can launch the remote debug tools from inside a Chrome web page:
Then, from the More Tools menu, you can select ~Remote Devices~:
In the Remote Devices panel, you should be able to see your device (connected to the computer through adb) and select which webpage you want to inspect:
Once you select the remote page that you want to inspect, ChromeDev Tools will show you a rendering of the remote display.
Note: Chrome only shows the elements inside the DOM. Other elements like a Custom ButtonBar or an on-screen Keyboard are not going to be shown.
That’s all for now.
Zebra’s Enterprise Browser team put a lot of resources on the Developer Portal and on TechDocs. If you have any questions, you can use EB’s discussion forum on the Developer Portal.

Pietro Francesco Maggi
Replies